Argo CD
What is Argo CD ?
Above is not that specific.
So what Argo CD does is look in git repository for .yaml files, helm charts etc... and deploy them to your Kubernetes. You can easily then deploy your apps to one or many clusters. The .yaml files will be nice under control of git, and you can see changes backwards in time. No more just folders full of files.
It has nice UI, and what is a big bonus, it tracks if your app actually deployed, not just fires the deployment and forgets about it. But keeps track. Even gives you easy access to pod logs from UI.
Argo CD runs in your Kubernetes cluster, that is very much aligned with my philosophy, to keep everything contained in Kubernetes. This also in effect helps with security, you do not have to give kubectl config file to anybody.
Install Argo CD
#create namespace
root@control01:~# kubectl create namespace argocd
#Install as on any other cluster
root@control01:~# kubectl apply -n argocd -f https://raw.githubusercontent.com/argoproj/argo-cd/stable/manifests/install.yaml
After deployment, you should see following pods:
root@control01:~# kubectl get pods  -n argocd
NAME                                                                              READY   STATUS    RESTARTS   AGE
argocd-redis-896595fb7-4ppbt                                        1/1     Running          0          3h
argocd-applicationset-controller-7dd9d4b769-g9mhk   1/1     Running          0          3h
argocd-notifications-controller-759b6bcc4d-vfch9         1/1     Running          0          3h
argocd-server-5674bcbc44-f9zhh                                    1/1     Running          0          3h
argocd-application-controller-0                                       1/1     Running          0          3h
argocd-dex-server-655f944db8-4gq7m                           1/1     Running          0          3h
argocd-repo-server-856b477f86-hglvg                            1/1     Running          0          3h
And following services:
root@control01:~# kubectl get svc -n argocd
NAME                                                         TYPE        CLUSTER-IP      EXTERNAL-IP                  PORT(S)                      AGE
argocd-applicationset-controller             ClusterIP   10.43.7.236           <none>        7000/TCP,8080/TCP                    19m
argocd-dex-server                                    ClusterIP   10.43.231.214       <none>        5556/TCP,5557/TCP,5558/TCP   19m
argocd-metrics                                         ClusterIP   10.43.79.79           <none>        8082/TCP                                   19m
argocd-notifications-controller-metrics   ClusterIP   10.43.47.65           <none>        9001/TCP                                   19m
argocd-redis                                             ClusterIP   10.43.98.160         <none>        6379/TCP                                   19m
argocd-repo-server                                  ClusterIP   10.43.61.116          <none>        8081/TCP,8084/TCP                  19m
argocd-server                                           ClusterIP   10.43.240.143        <none>        80/TCP,443/TCP                        19m
argocd-server-metrics                              ClusterIP   10.43.234.98          <none>        8083/TCP                                   19m
Since I'm using metallb I want to attach external IP to the UI. I will edit the existing service for argocd-server by patching it.
root@control01:~# kubectl patch service argocd-server -n argocd --patch '{ "spec": { "type": "LoadBalancer", "loadBalancerIP": "192.168.0.208" } }'I have just added type: LoadBalancer and loadBalancerIP. You can do the same by directly patching the service with command:
Then check the service:
root@control01:~/argo_cd# kubectl get svc -n argocd
NAME                                                         TYPE              CLUSTER-IP      EXTERNAL-IP     PORT(S)                                   AGE
argocd-applicationset-controller             ClusterIP          10.43.7.236     <none>          7000/TCP,8080/TCP                      3h7m
argocd-dex-server                                    ClusterIP          10.43.231.214   <none>          5556/TCP,5557/TCP,5558/TCP   3h7m
argocd-metrics                                         ClusterIP          10.43.79.79     <none>          8082/TCP                                      3h7m
argocd-notifications-controller-metrics   ClusterIP          10.43.47.65     <none>          9001/TCP                                      3h7m
argocd-redis                                             ClusterIP          10.43.98.160    <none>          6379/TCP                                     3h7m
argocd-repo-server                                   ClusterIP         10.43.61.116    <none>          8081/TCP,8084/TCP                     3h7m
argocd-server-metrics                              ClusterIP          10.43.234.98    <none>          8083/TCP                                      3h7m
argocd-server                                           LoadBalancer   10.43.240.143   192.168.0.208   80:30936/TCP,443:32119/TCP   3h7m
I now have access to the UI under IP: 192.168.0.208 and port: 80 but that will switch to 443 anyway.
Username: admin and password is randomly generated. Get it like this:
root@control01:~/argo_cd# kubectl -n argocd get secret argocd-initial-admin-secret -o jsonpath="{.data.password}" | base64 -d; echo
cLJq8ewDxxutjiKS
Install Argo CD CLI tool
We can install Argo CD CLI tool by following steps:
root@control01:~/argo_cd# curl -sSL -o /usr/local/bin/argocd https://github.com/argoproj/argo-cd/releases/latest/download/argocd-linux-arm64
root@control01:~/argo_cd# chmod +x /usr/local/bin/argocd
Log in to the argo-server IP, in my case 192.168.0.208 :
root@control01:~/argo_cd# argocd login 192.168.0.208
WARNING: server certificate had error: x509: cannot validate certificate for 192.168.0.208 because it doesn't contain any IP SANs. Proceed insecurely (y/n)? y
Username: admin
Password:
'admin:login' logged in successfully
Context '192.168.0.208' updated
List the argo servers:
root@control01:~/argo_cd# argocd cluster list
SERVER                          NAME        VERSION  STATUS   MESSAGE                                                  PROJECT
https://kubernetes.default.svc  in-cluster           Unknown  Cluster has no applications and is not being monitored.
You might see status Unknown, but this should change the moment we try to deploy something.
Test deployment
Just to make sure everything is working, we will deploy a simple hello world application. Argo CD, as the name suggest, is a CD. A continuous delivery tool. It does not build your application, create a docker image or push it to the registry. It just deploys your application, plus monitor its running state. Also, it will update your app if the deployment changes. I'm currently at hunt for the CI part, that could live inside my Kubernetes cluster, same as Argo.
But for now we are going as simple as possible.
Create a new repo
Create git repo with your project (Argo CD accepts YAML, helm charts, and more) in GitHub, GitLab or what ever git provider you use. I might need to create a special helm page, just to talk about helm charts. It's quite interesting, and you might want to use it. But for this example I will use just YAML files.
I have created this repo on my own gitlab: Argo-cd-example
And in there I have created a folder called hello-world. The idea is that you need to point the Argo CD to some directory, it does not like to use the root of the git repo.
Our deployment is official NGINX Hello World docker image. It supports arm64 architecture, so no need to work extra hard.
In our git / folder, I have added the following files:
Deployment itself: deployment.yaml
---
apiVersion: apps/v1
kind: Deployment
metadata:
  name: hello-world
spec:
  replicas: 1
  selector:
    matchLabels:
      app: hello-world
  strategy:
    type: Recreate
  template:
    metadata:
      labels:
        app: hello-world
    spec:
      containers:
      - image: nginxdemos/hello
        name: hello-world
        resources:
          requests:
            memory: "128Mi"
            cpu: "250m"
          limits:
            memory: "384Mi"
            cpu: "500m"
        ports:
        - containerPort: 80
          protocol: TCP
          name: hello-world
Service so we can access the replicas: service.yaml:
apiVersion: v1
kind: Service
metadata:
name: hello-world
spec:
selector:
app: hello-world
type: LoadBalancer
ports:
- name: hello-world
protocol: TCP
port: 80
targetPort: 80
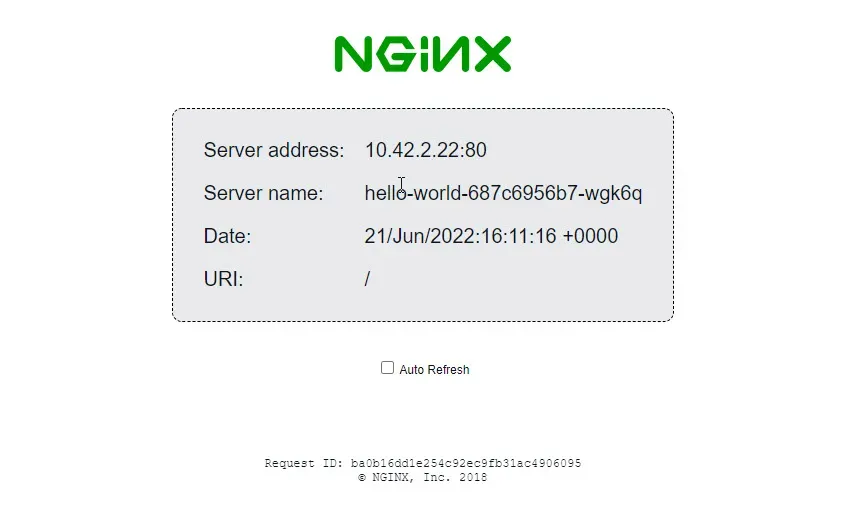
loadBalancerIP: 192.168.0.209Nothing special, it should create one running replica of NGINX hello-world app, that if accesses on port 80 via browser should return some basic info about the node where it's running. And service will assign it to IP: 192.168.0.209. This should be enough to get us going.
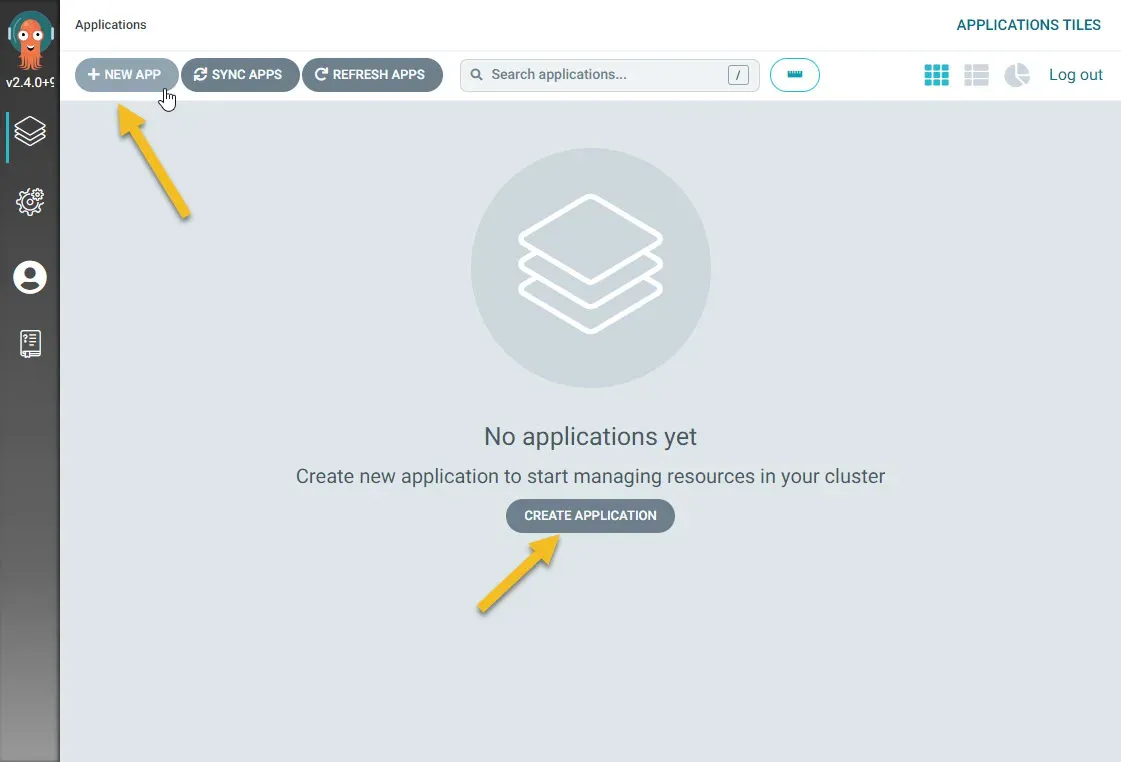
New app in Argo CD
Now jump into the Argo CD UI and create a new app. We could use CLI and define everything in single line, but this way it's more visually clear what we are doing. You can always use CLI to do everything later on.
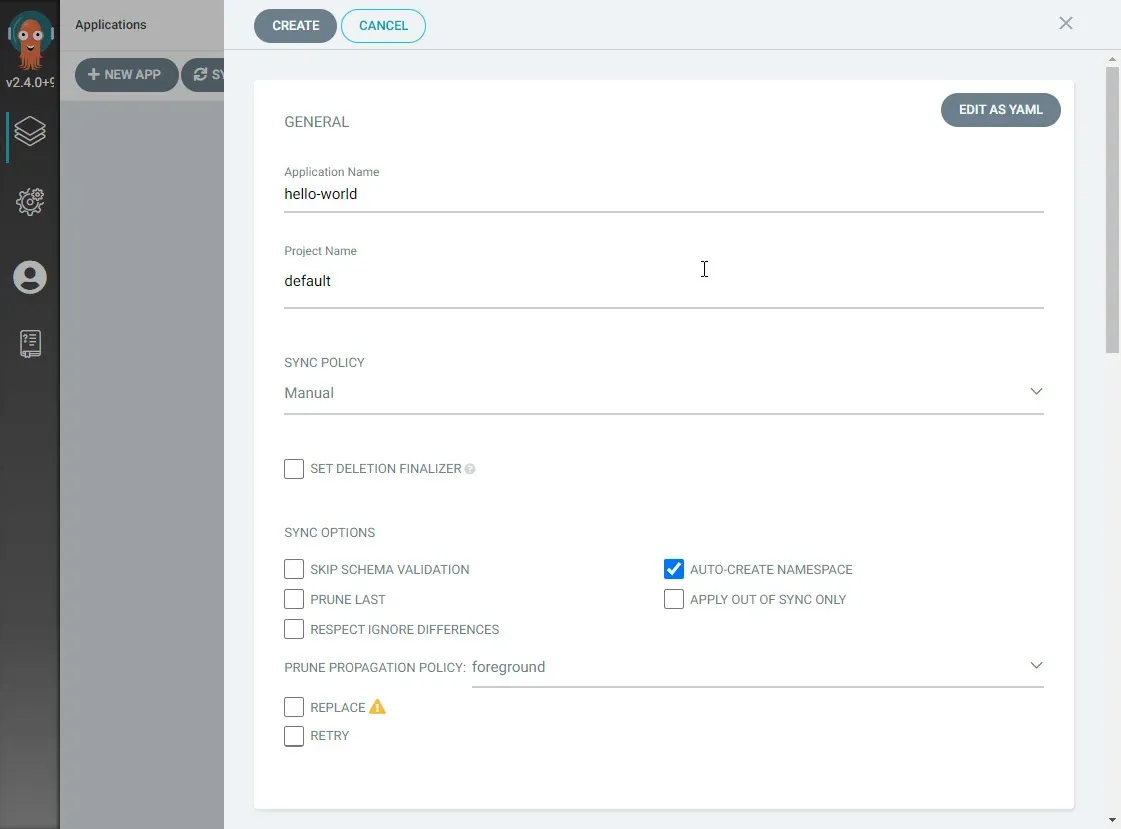
And start filling up the basics.
- Application Name:
hello-world- Careful what you type here, use lowercase and no spaces. - Project Name:
default- You can only select project you have created ordefault. More here - Auto-create namespace:
yes- I have checked this to create new namespace for the app. - Cluster URL:
https://kubernetes.default.svc- This is the internal cluster URL, it should exist by default in our k3s cluster.
The rest is pretty self-explanatory.
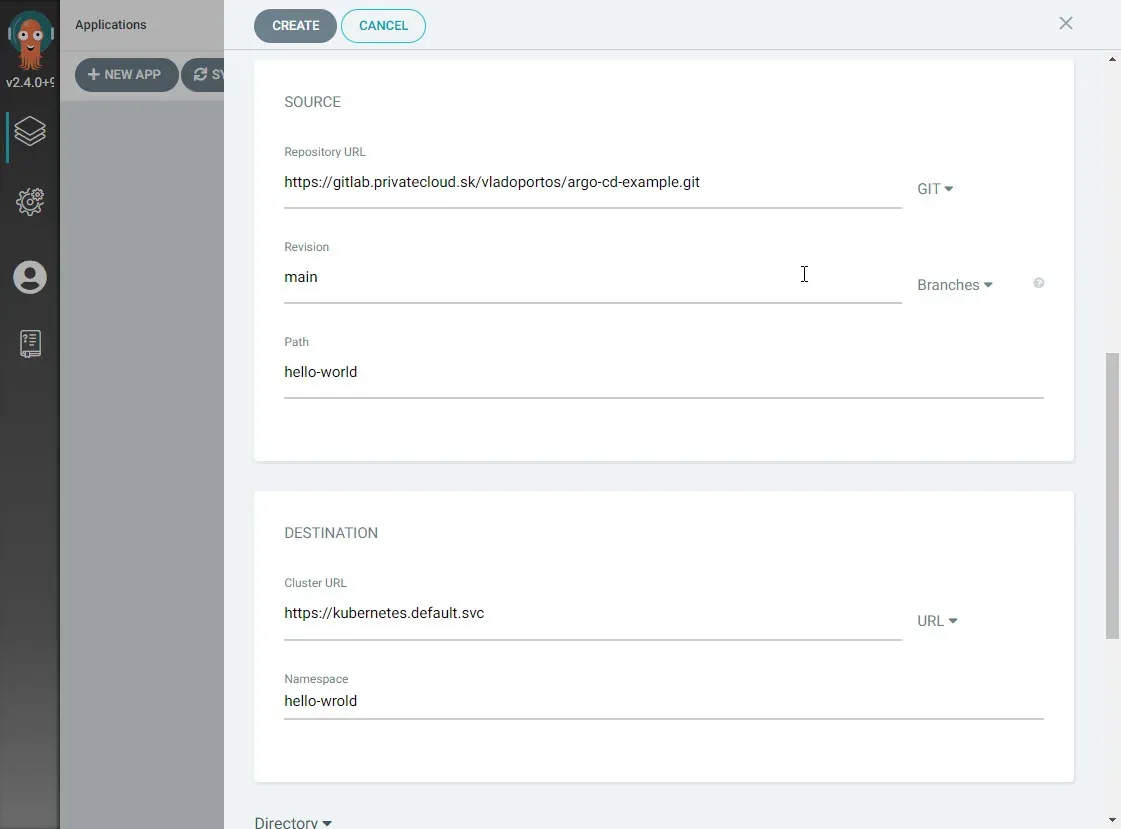
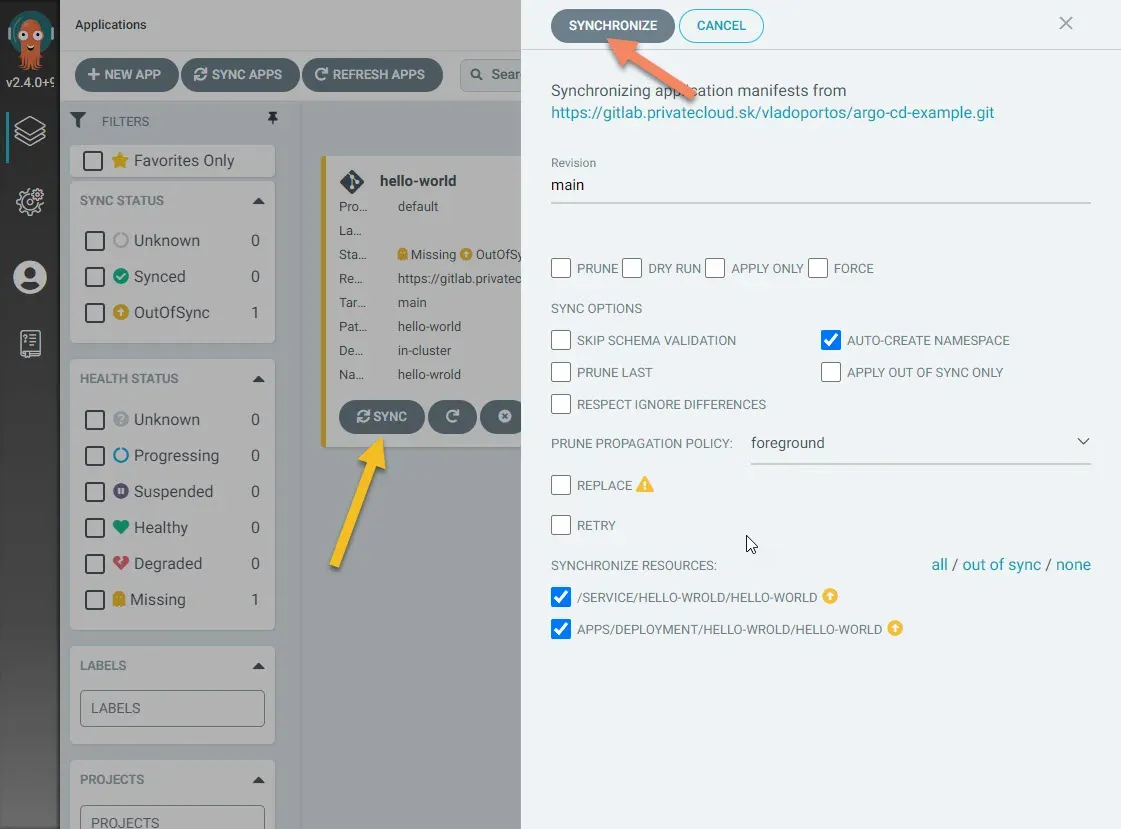
Hit Create on the top left. You should get the following page:

Because I did not set auto sync to yes, I need to manually sync the app. Hit the Sync button and then again on the top Synchorize.
After a while (it needs to download the image), you should see the following:
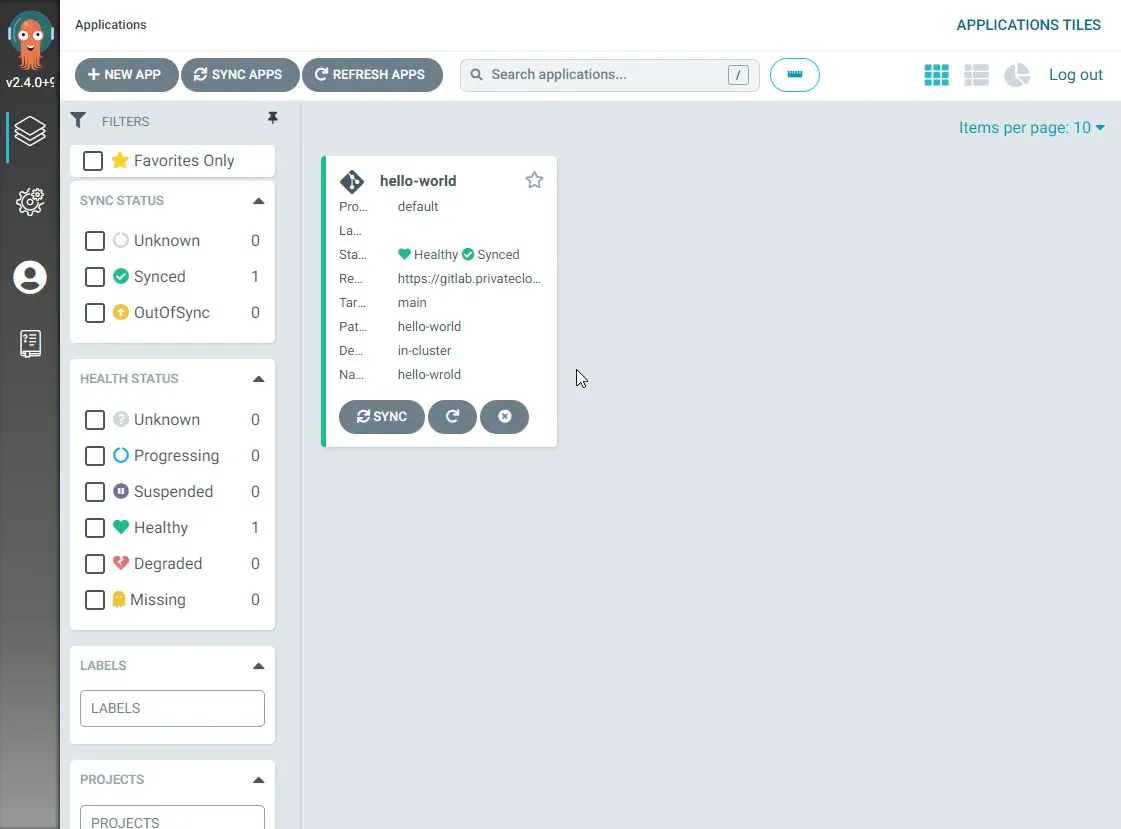
Cool right? But that's not all! Give a click on the box with the app name, and you should see the following:

Click on each box, and you will get more information about each part of the app and deployment. You can even get logs from the containers, which is super convenient.
Also go and check the app IP via browser.
Continuous delivery
Now for some continuous delivery magic. Click on App Details in the top left. Then Edit and down there is SYNC POLICY option, turn it on. This will make Argo CD to look periodically (I think it's every 3 to 5 min) to that git and apply changes you made there.
Save the changes you made, on the top.Now, go to the deployment files in git and change one line.
replicas: 1To
replicas: 2Push and wait, Argo should do the changes on the cluster.
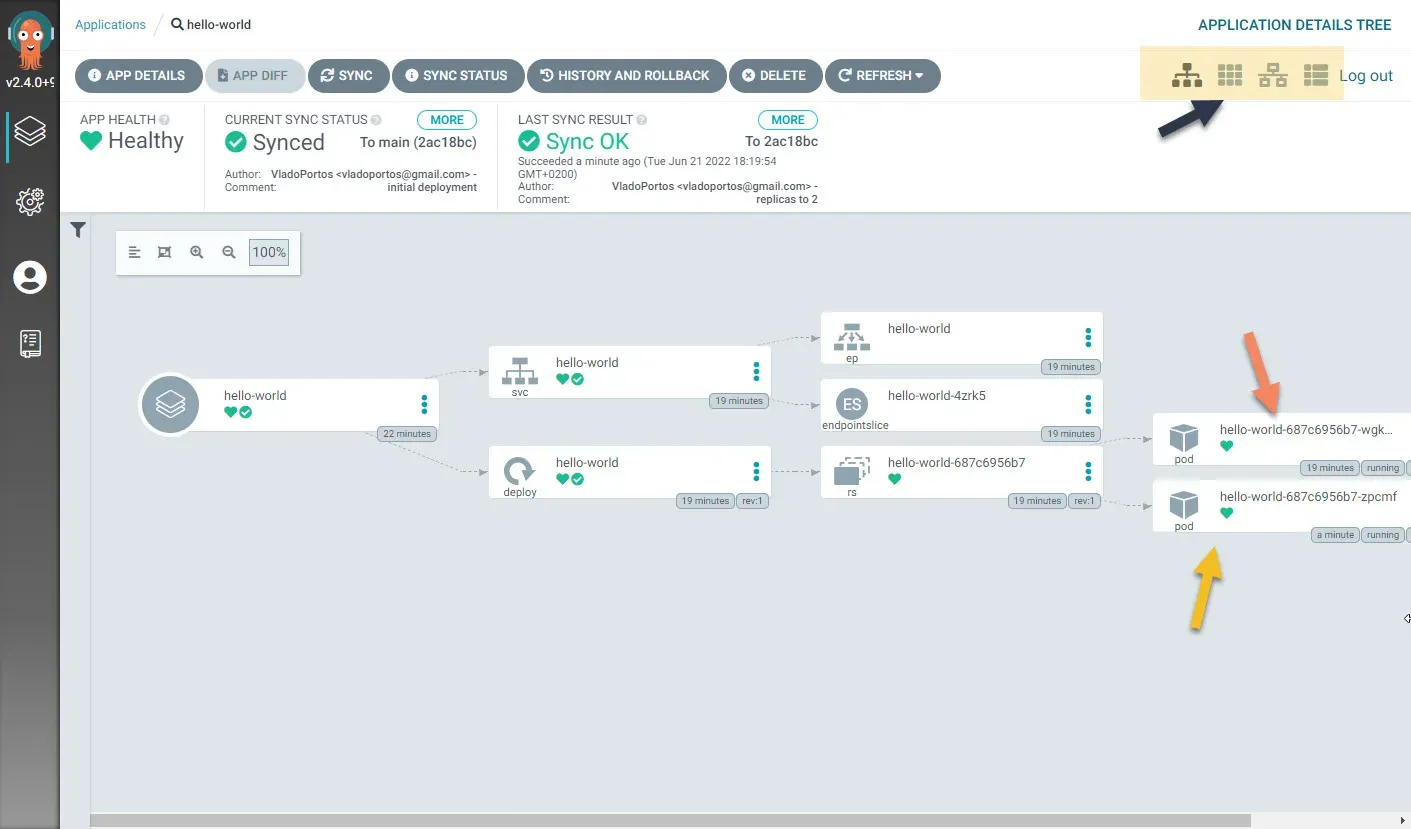
Also click the different views on the top right, you will get a kick out of that.
Example
I'm in process of moving everything into GitOps Argo CD for my Kubernetes cluster. Everything I deployed in this guide manually will be eventually managed via GitOps and Argo CD. There are some issues still, for example Argo CD right now, before version 2.5 does not allow separate values.yaml for helm chart and require it to be in the same repo as the helm chart. Which is a problem, because if you're going to use official repo location you can't edit that file...
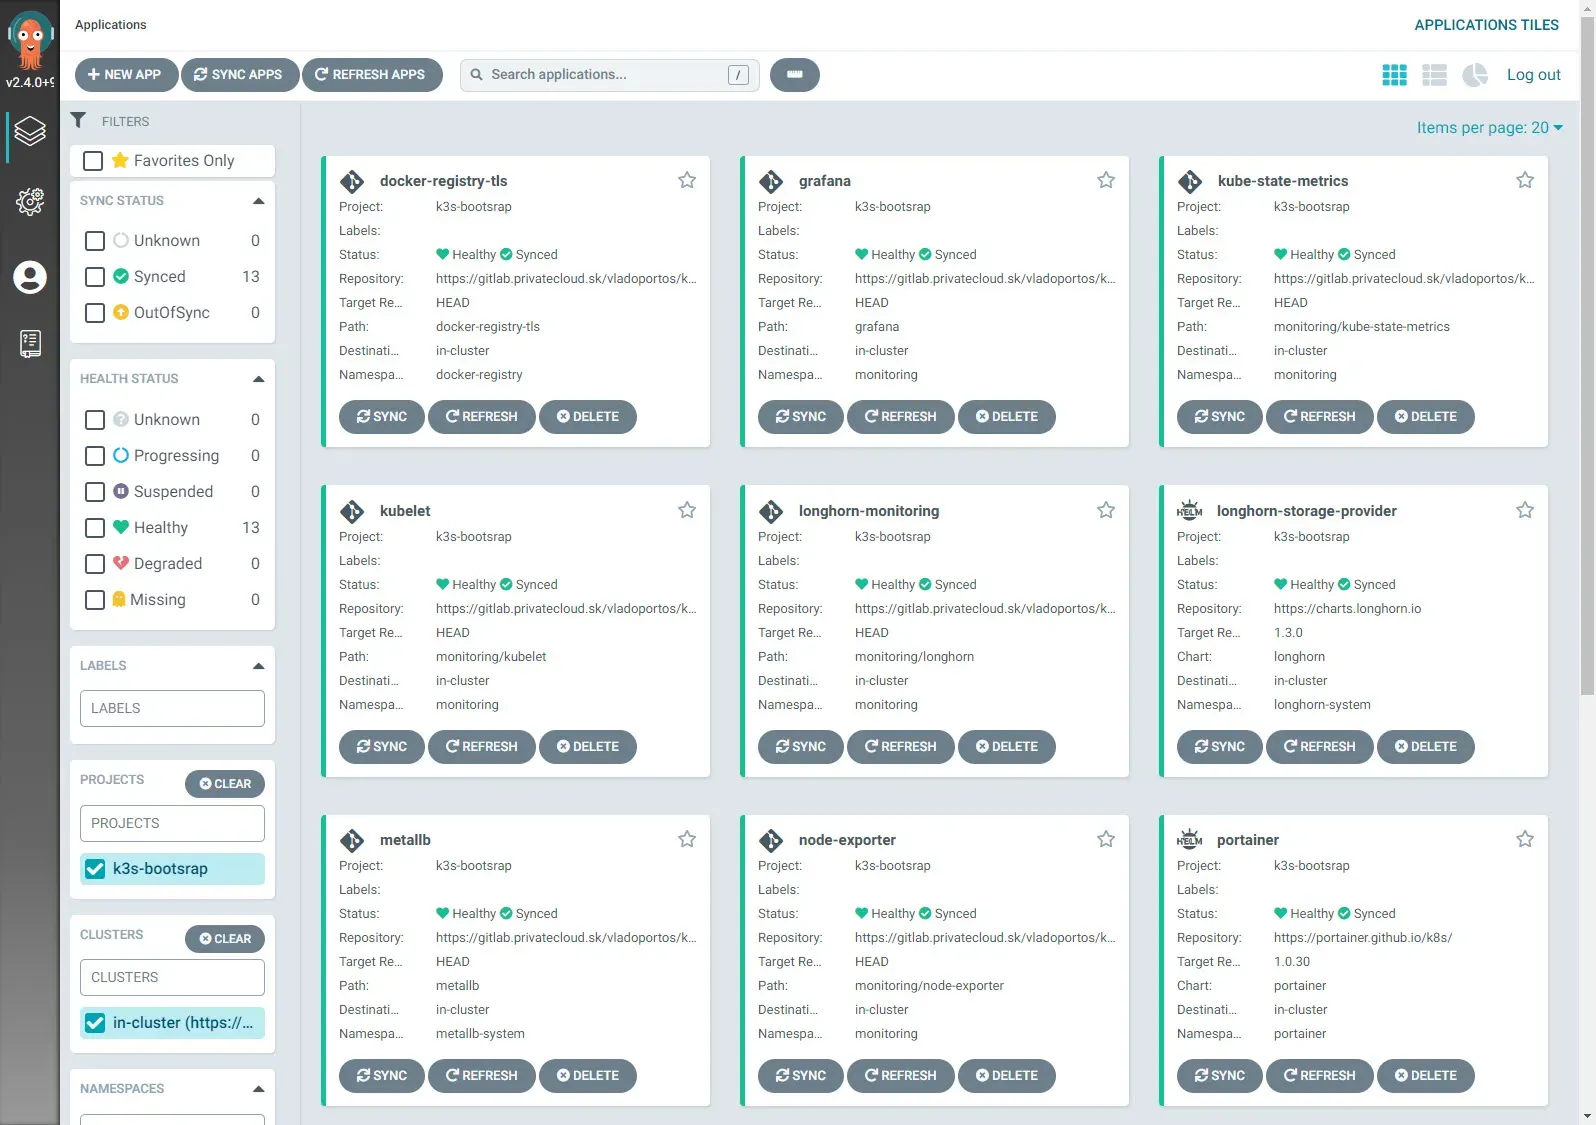
There is a lot you can do and setup, but I need to stop here. It's already a pretty long guide, and the basics to get you up and running are here. You can continue with the Official Manual if you want.
Now take a break, eat and drink some coffee. And perhaps you can get me one too.