Intro LoraWan with Raspberry Pi

So, I had an idea for very long time to get long range tracking and sensors working. I do not have actual practical use for this solution, just the implantation and generally learning about it is interesting to me. LoraWan is good for outdoor, long range communications and battery operated sensors, but not much for indoor use (in my opinion) for indoor sensors that are battery operated I would go with ZigBee or 433Mhz RF solutions, although they are, in broad strokes, the same if I squint my eyes hard enough... 😄
In this page I will go over what I know about LoraWan, terms and technology. One thing that I noticed is that most LoraWan manuals and hardware are written in such that for new comer it could be daunting. To the point when even I had a problem to understand because guide was referring to something the writer expect people to just know.
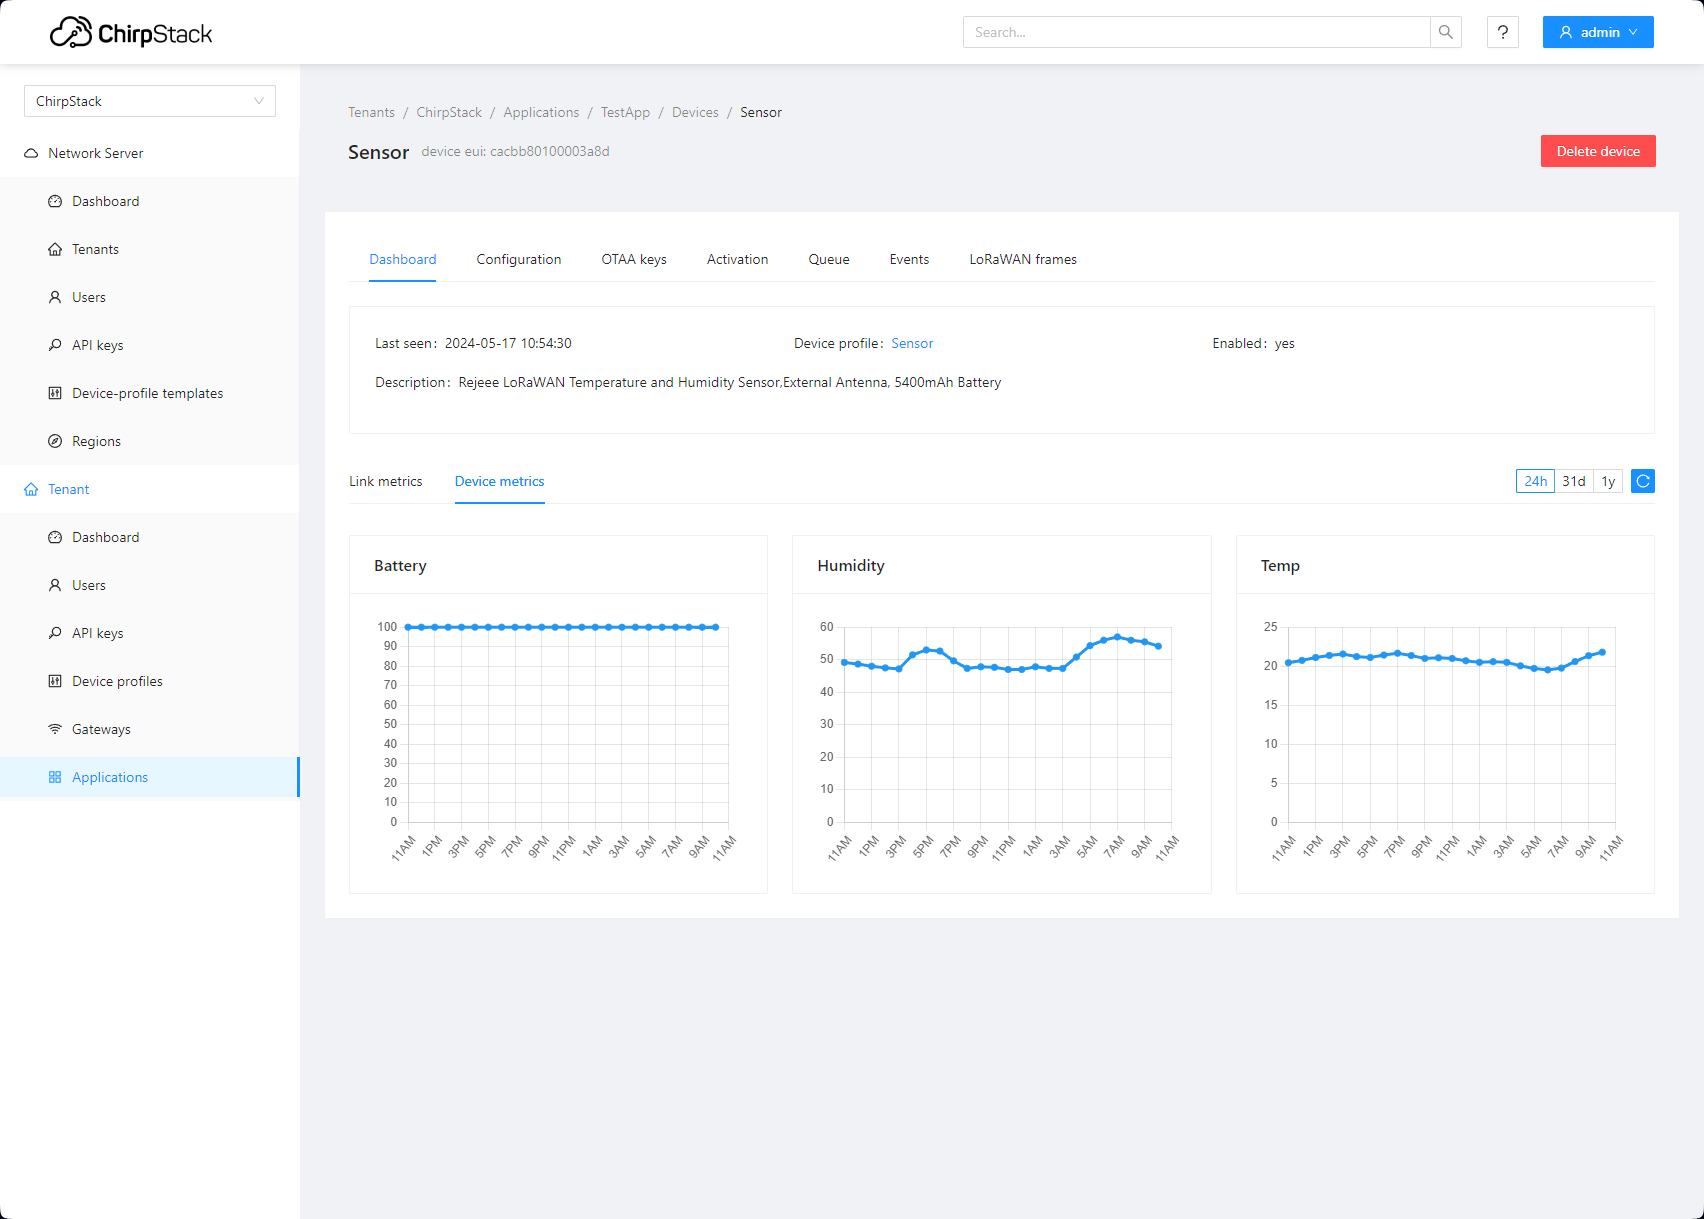
I got it working!
I know this is very early in this articles, but yes, I got it to work.
LoraWan Gateway (Do not worry what that is now, read bellow and you will get it ) made out of Raspberry Pi 4B and special addon HW to allow it to receive LoraWan packets. And ChripStack this is the software part that consume the packets, and present the data. I have myriads of ESP32 LoraWan device that I want to test as well. But the first one I want to focus is a LoraWan sensor I got from AliExpress (not an add) Rejeee Temperature and Humidity Sensor Its quite nice, and the battery should last 10 years ! Although I doubt its actually going to live 10 years, its going strong for over 1 year now without an issue.

Also my LoraWan Gateway looks like this.
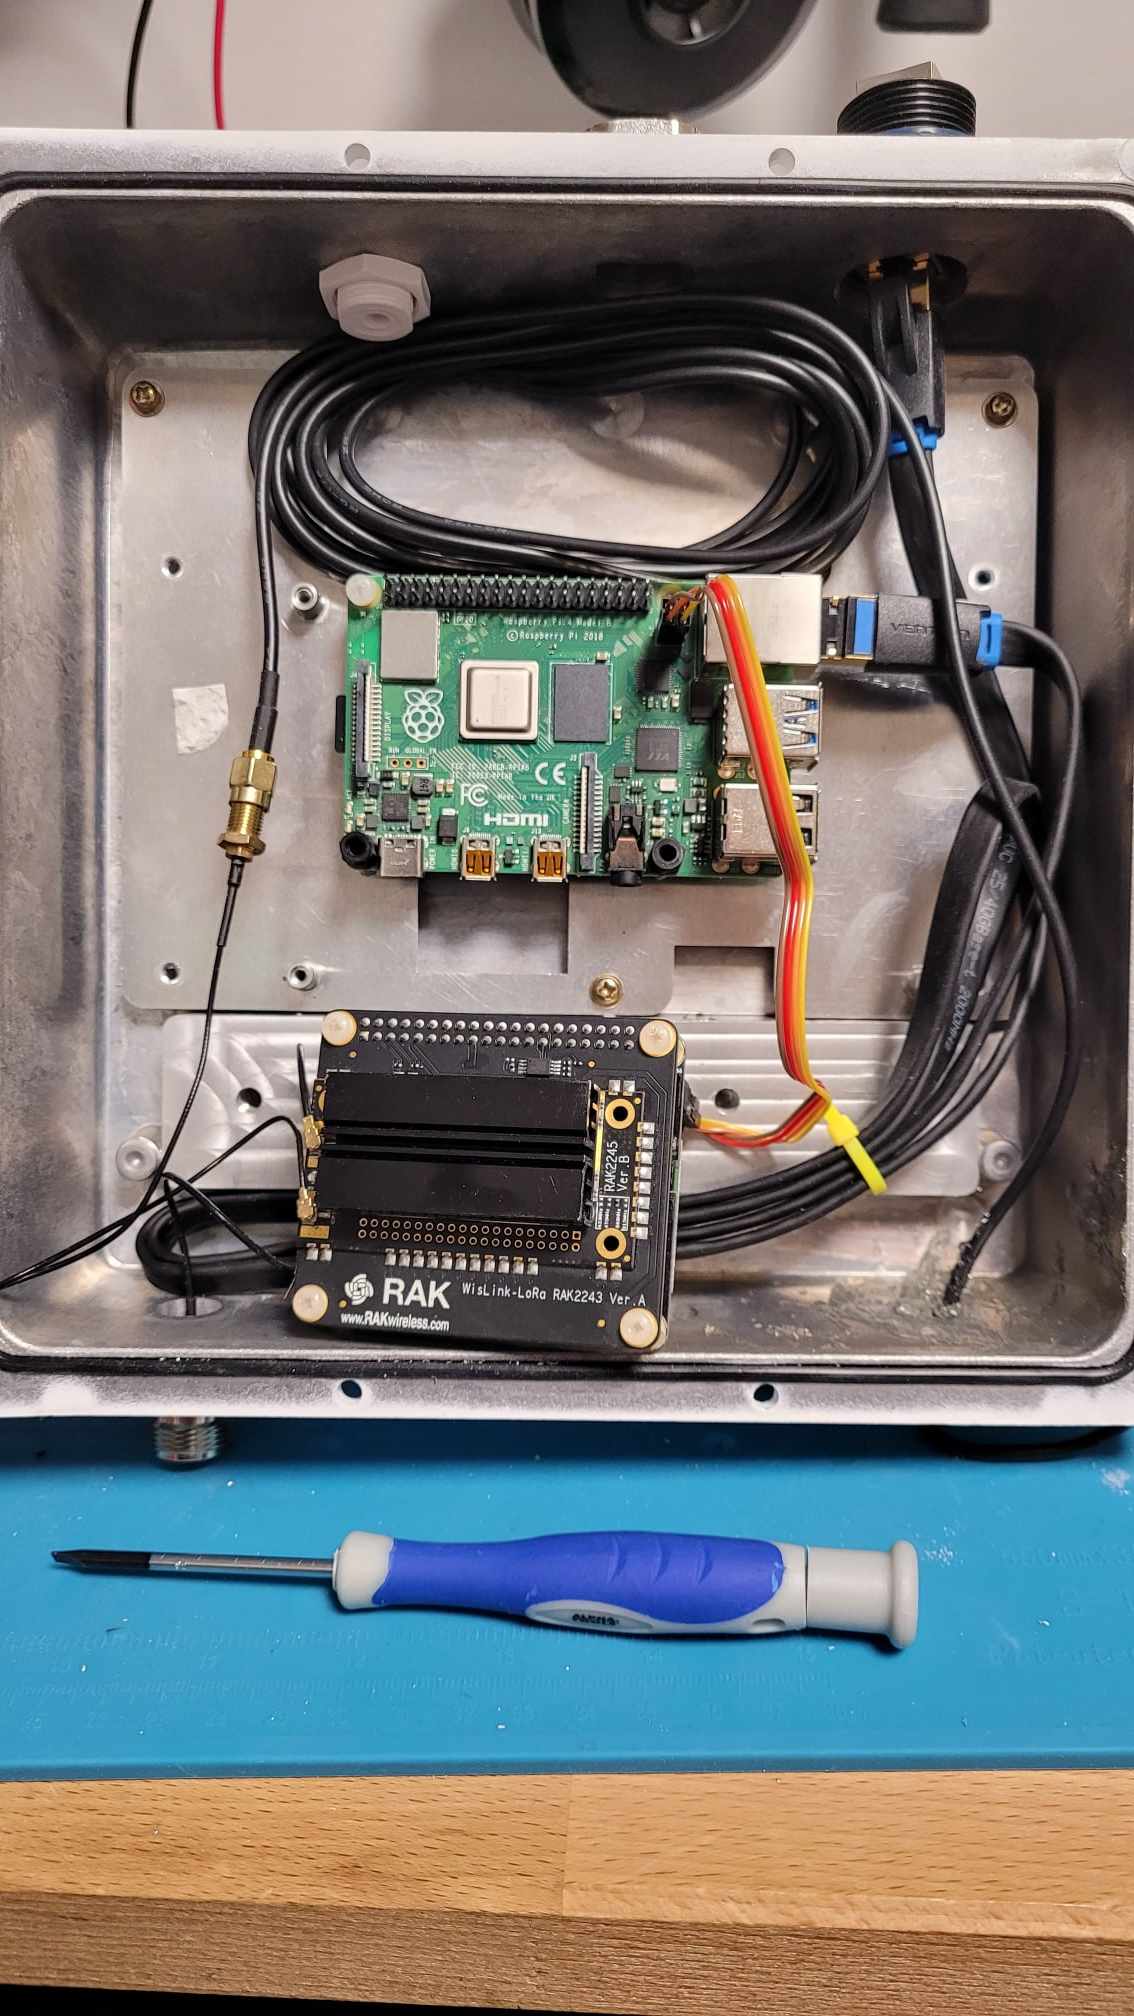
Bit ghetto setup, I know, and more pictures of fully assembled gateway will be in HW section.
Now lets jump to the next section about theory.