MkDocs CI/CD

What ?
In this article I note down how I set up automated build and upload of this site to the web using GitLab.
This side is generated from Markdown type files using MkDocs https://www.mkdocs.org/, which is super useful for generating a technical documentation style site that is fast and clear to read.
Old process
I store the source of this page in my private GitLab that is running on a server inside my network. I could deploy it to my K3s server, however GitLab is quite a hefty boy, and to avoid issues I run it on an Unraid server with a reverse proxy, so I can access it from the Internet through HTTPS.
So, my old process was to have GitHub Desktop to sync folders from GitLab to my local PC. I edited the files locally, then built the site using mkdocs build and manually logged in to FTP of my website and uploaded the files. Then I would sync all changes to GitLab.
This works fine if you do small changes once a month 🙂. However, I find typos and add new pages quite often and it is taking forever, it’s 2021! I should get out of a cave and set up CI/CD.
This is the new way !
CI/CD I'm going to setup will do the following:
- I edit the page locally
- Push to GitLab
- GitLab provision docker image on my rpi4 (Image we build containing what we need)
- Build using MkDocs in that docker image
- Upload the result to my hosting
- Nuke the docker container
I know there are ways to do this without a docker like linking your Kubernetes cluster to GitLab, but I decided that Kubernetes is complicated enough and this is a simple task. Another option is to run gitlab runner directly on your machine, but this requires to run it as root as far as I remember so no... Nice middle part is using GitLab runner in docker and have it separated from OS a little using docker images, while avoiding complexity of Kubernetes.
Why ?
There are a ton of different ways this can be achieved, but I had ulterior motives in writing this. I also think this might be a nice intro to CI/CD tools in GitLab, which I like a lot (but they are not perfect). It is like having Jenkins bundled with your Git. Sharp, right?
How ?
This is not a guide from ground zero, there are some pre-requisites:
- GitLab - I'm using my own locally hosted, perhaps free account on GitLab would work the same..
- Docker Register - Again, I'm using my own deployed on K3s, but any other docker registry could work.
- Raspberry Pi 4 with Docker - Again, I'm using my control01 from my Kubernetes cluster, but any Linux with docker should do the trick.
Custom Docker image
We can start with a custom Docker image. GitLab runner, a software that will execute your commands from GitLab’s .gitlab-ci.yml file, will use this image by copying git where your site .md files are and execute whatever you like. So, we know that MkDocs is running the mkdocs build command to build the site, and in my case it also needs additional plugins and themes pre-installed in builde
Therefore, on my control01 rpi4 server I have created new folder mkdocs-builder and in it I have made a new file, Dockerfile, containing:
FROM alpine:latest

RUN \
  apk add --update \
  ca-certificates \
  bash \
  git \
  openssh \
  python3 \
  python3-dev \
  py3-pip \
  lftp \
  build-base && \
  pip install --upgrade pip && \
  pip install mkdocs && \
  pip install mkdocs-minify-plugin && \
  pip install mkdocs-drawio-exporter && \
  pip install mkdocs-material && \
  pip install mkdocs-ko-fi-button-plugin && \
  pip install mkdocs-windmill && \
  pip install mkdocs-git-revision-date-localized-plugin && \
  pip install mkdocs-windmill-dark && \
  rm -rf /tmp/* /var/tmp/* /var/cache/apk/* /var/cache/distfiles/*

CMD ["sh", "-c", "tail -f /dev/null"]
As you can deduct from the lines, it will use alpine:latest image (because alpine is built for almost all architectures), then it installs git and other software. Next, pip installs MkDocs with all the plugins I need. Lastly, cleanup. The last line will make sure that Docker container will not exit the moment it starts; docker needs some process to be running.
This give us all that we need to build our page and push it via ftp using lftp.
Build it and push it to the registry of your choice. The one mentioned in this command is my local one.
root@control01:/home/ubuntu/mkdocs-builder# docker build . -t registry.cube.local:5000/mkdocs-builder
root@control01:/home/ubuntu/mkdocs-builder# docker push registry.cube.local:5000/mkdocs-builder
Nicely done! Our mkdocs-builder image is snugly stored in Docker Registry. Let’s move on!
GitLab Runners
This is a small client/software that talks to GitLab server, either your own or the public one, and executes your commands. There is more to it than that, like reporting back with the results so you can see it nicely in GitLab web UI, or handling build files through stages... but that’s not important now.
Also, there are more options for running this GitLb Runners, read more here: https://docs.gitlab.com/runner/. We are using the Docker choice.
First, create docker volume to store config in. You will most likely never have to edit this manually.
root@control01:/home/ubuntu/mkdocs-builder# docker volume create gitlab-runner-configDeploy a small container with GitLab runner (this one will be always on).
docker run -d --name gitlab-runner --restart always \
    -v /var/run/docker.sock:/var/run/docker.sock \
    -v gitlab-runner-config:/etc/gitlab-runner \
    gitlab/gitlab-runner:latest
Now we trigger the registration process to your GitLab.
docker run --rm -it -v gitlab-runner-config:/etc/gitlab-runner gitlab/gitlab-runner:latest registerYou are asked a few questions, but none except URL and token are important: you can change that later.
Enter the GitLab instance URL (for example, https://gitlab.com/):
https://gitlab.privatecloud.sk
Enter the registration token:
sometoken
Enter a description for the runner:
[159002b83191]: rpi4cluster
Enter tags for the runner (comma-separated):
rpi, kubernetes, rpi
Registering runner... succeeded
Enter an executor:
docker
Enter the default Docker image (for example, ruby:2.6):
ubuntu:20.04
But hold on you sexy beast, where do I get that magical token? Go into your GitLab instance -> Your project -> Settings -> CI/CD and expand Runners.
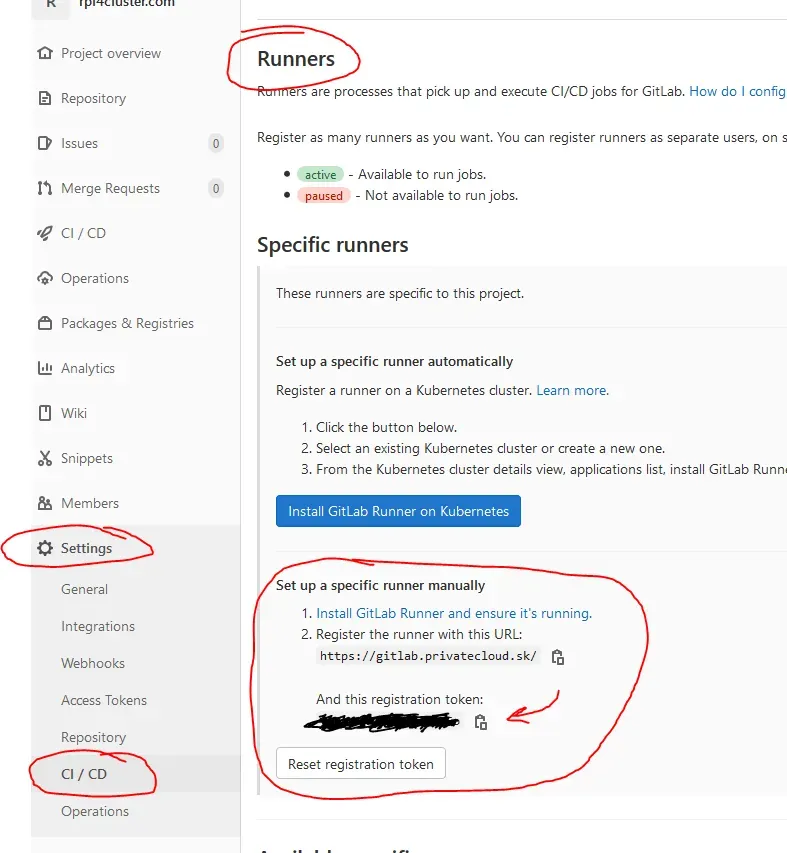
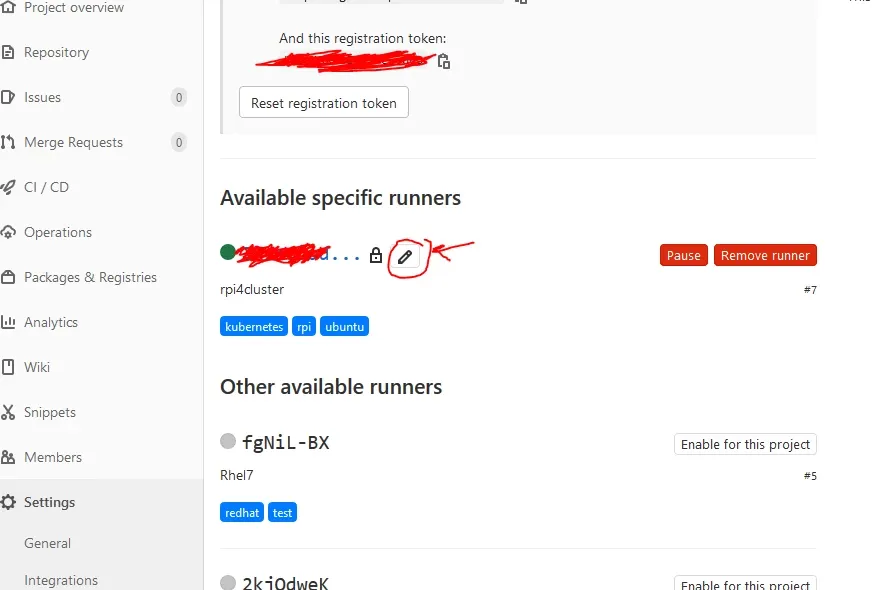
If all went right, you should have Runner in green right under the place where you got the token.
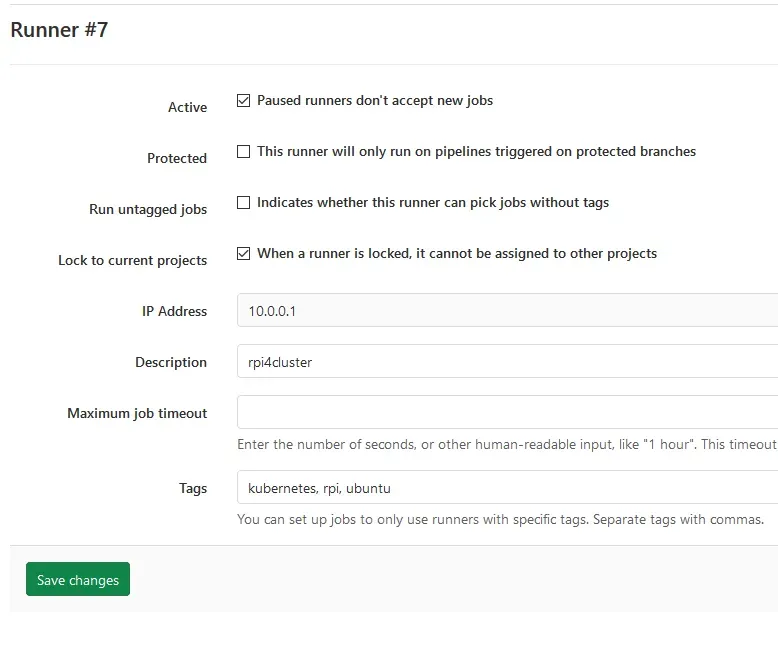
You can edit a few things by clicking on the pen icon, if you like.
.gitlab-ci.yml
Now that we have set up Docker image we use for building and Docker hosted GitLab Runner, we can create .gitlab-ci.yml, which tells GitLab what to do. Apart from a few details, think of this as a set of commands you would type if you deployed your stuff manually, built the program and copied it somewhere, run unit tests, etc...
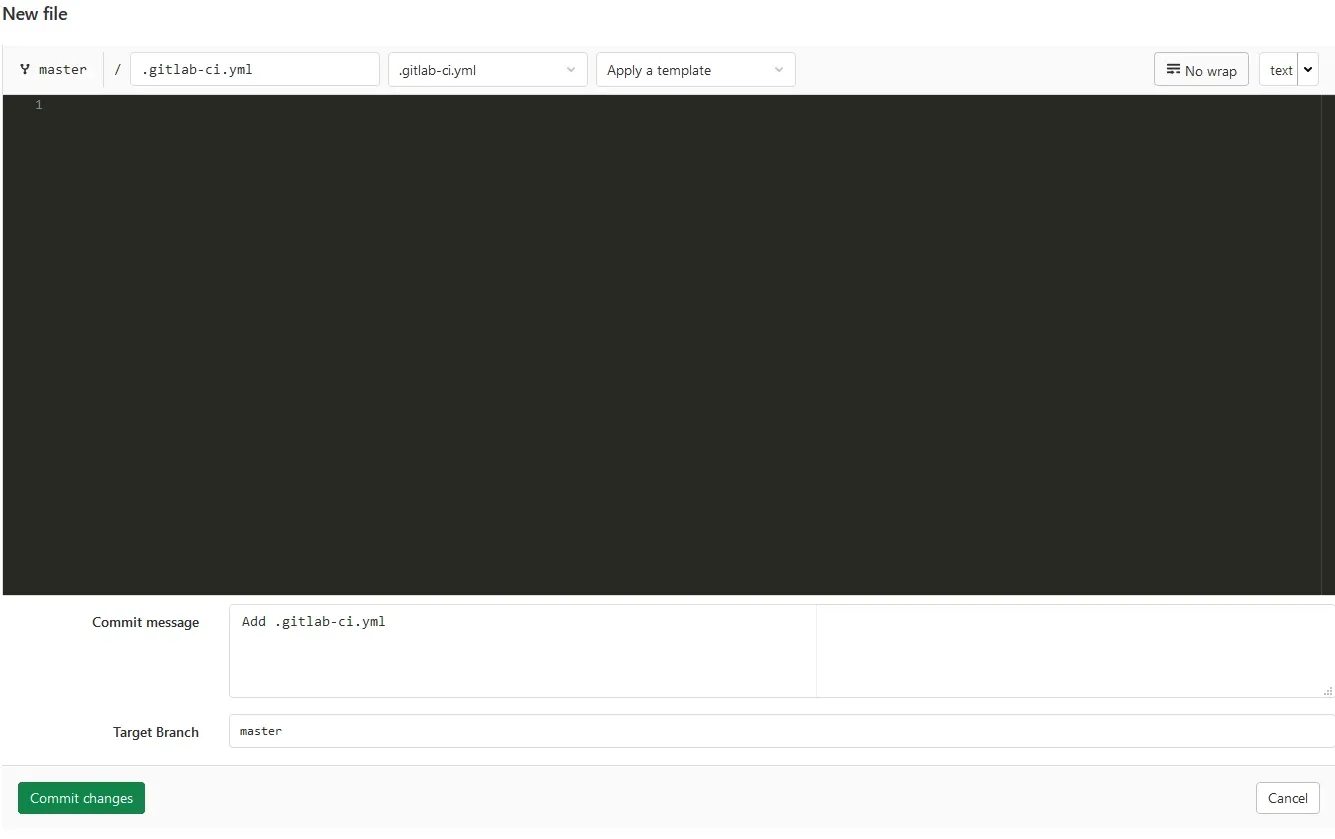
Go to your project main page, and if you never set up CI/CD, you should have button like this Set up CI/CD:

Clicking on it, you will automagically get .gitlab-ci.yml in your repository and editor to edit.
This is what is in mine, and I will explain it:
image: registry.cube.local:5000/mkdocs-builder

stages:
  - deploy

Build and Upload:
    stage: deploy
    tags:
        - rpi
    script:
        - mkdocs build
        - cp -rT web-server-files site
        - lftp -e "set ssl:verify-certificate no; open ftp.rpi4cluster.com; user $FTP_USERNAME $FTP_PASSWORD; set ftp:list-options -a; mirror --reverse --verbose --delete site/ rpi4cluster.com/web/; bye"
Lets go line by line:
image: registry.cube.local:5000/mkdocs-builder - We are telling the GitLab Runner to use our image, it will look for it, deploy it and copy our git in it by itself.
stages: and - deploy - You can define multiple stages like build, test, deployment. The naming does not matter. It’s important to keep in mind that GitLab Runner will create a new Docker Container for each stage, and if you do not use Artifacts (a method of storing data between stages) your deploy stage will not have the data you made in the build stage. Read more about artifacts here: GitLab Artifacts. I will make a separate page about this to make it clear: it’s not difficult once explained.
Build and Upload: - name of *** Job *** this name you will see in GitLab UI, it will be clear when I show you a picture later down.
stage: deploy - Here you need to specify which stage it actually is, and it has to match the stages: list. Stages are executed one by one as specified in stages:, particular stages do not have to be in that order in the yaml file.
tags: and - rpi - Remember when I mentioned tags when deploying GitLab Runner ? Well, here you need to specify the same tags that the Runner has, otherwise it will not be picked up. This makes it so you can use different runners, for example you wanted to test your code on RedHat and Suse, each are separate machines with their own runners, just tagged appropriately. An example of this will come later; it’s not needed here.
script: - Here we literally write out shell commands for the runner to execute one by one. Your runner will be in your git main root folder by default, so no need to specify full paths to files.
I'm executing mkdocs build to build the web, this will create everything in the folder site. Then I copy the files from web-server-files into the site folder. This mainly contains robots.txt and .htaccess, which are not generated by MkDocs.
In the end, everything is synced to my web hosting FTP server with lftp.
- set ssl:verify-certificate no # Ignore if ssl cert does not match
- open ftp.rpi4cluster.com # Open link to my FTP server
- user $FTP_USERNAME $FTP_PASSWORD # Use username and password from variables
- set ftp:list-options -a # List and see all files including .hidden ones
- mirror --reverse --verbose --delete #Reverse so the local folder is source,
#and delete to keep in sync, so when I delete in local it will be removed from ftp server as well
- site/ rpi4cluster.com/web/  #site is folder where the generated web is
#and the other path is path on ftp server.
- bye # Close the connection
Environmental variables or how to hide passwords
Where did you get $FTP_USERNAME and $FTP_PASSWORD from? Right, these are environmental variables passed to, well... the environment, by the GitLab Runner. A great place to hide sensitive information like passwords and usernames. If you host your gitlab and the repository is public, and keep this in your code anybody could see this sensitive data. There are literally scanners that looks for this mistakes to exploit in public Git, so be careful.
We can set these in: Your project -> Settings -> CI / CD -> expand Variables
Mine looks like this:
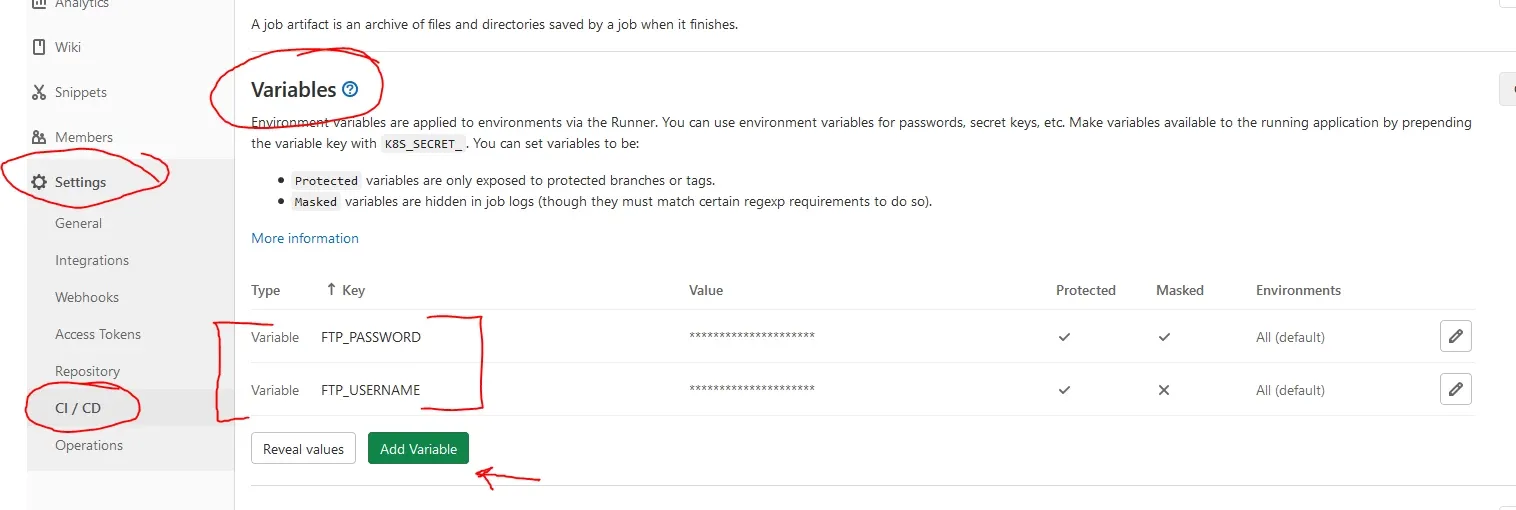
Simply click Add Variable
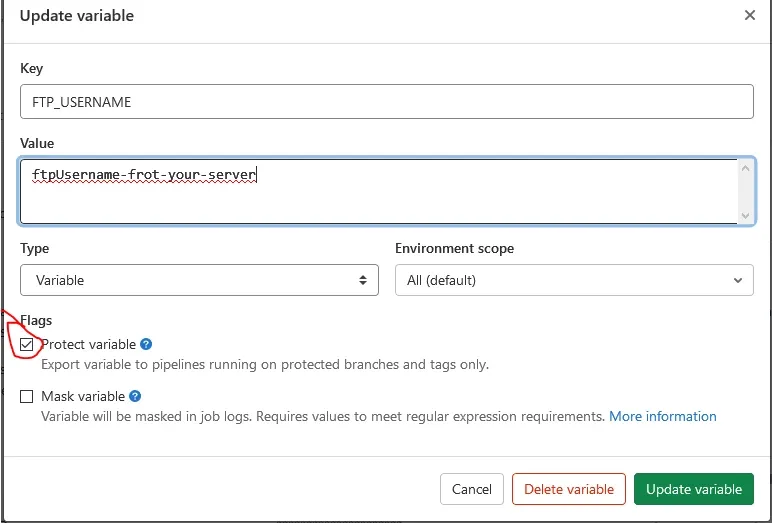
For *** User *** just check Protect variable
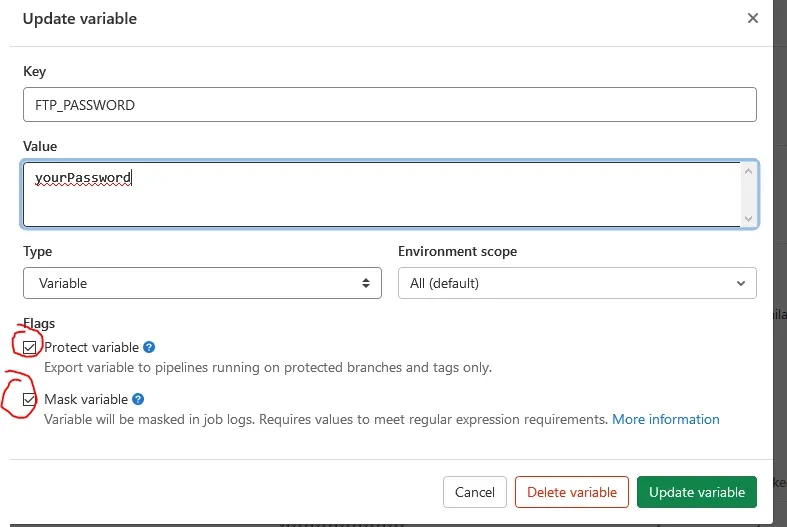
For *** Password *** make sure the value/password is base64 compatible, and than you can check both *** Protect and Mask ***. This will never display your password in the CI/CD pipeline.
Look at me go Mom!
As soon as there are detected changes in git, CI/CD will kick in and try to run the task we set up. You can watch this in *** Your Project -> CI / CD ***. This is where you can trigger it by clicking on Run Pipeline.
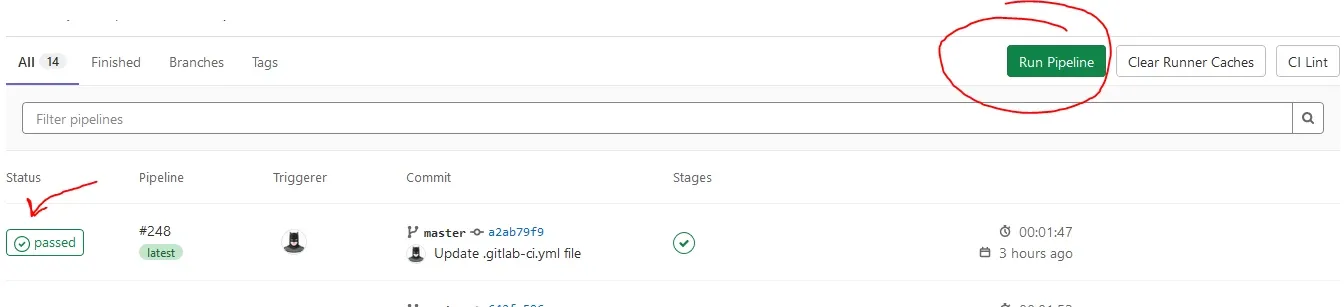
And when you trigger it, you will see the jobs below, and when you click on the Status you can observe the whole process.
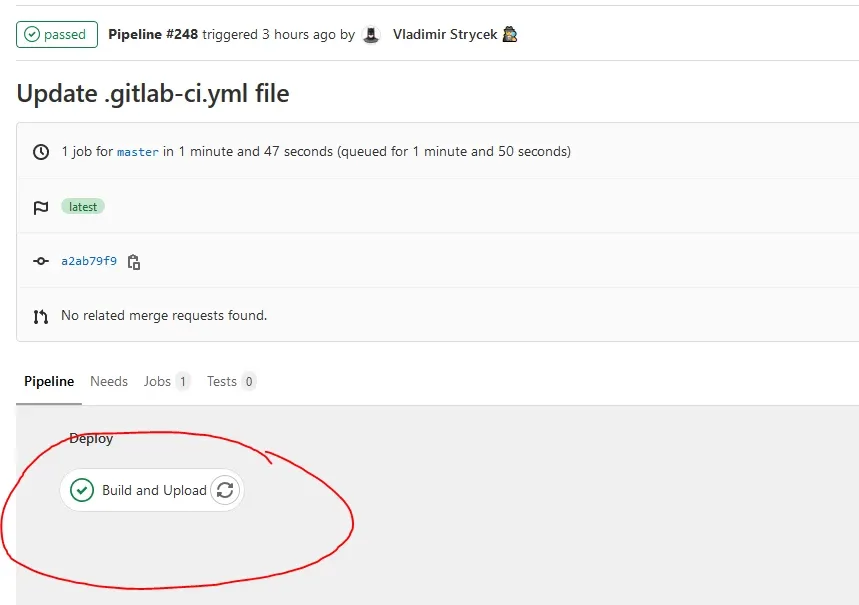
Above, as you can see, is the stage we named Build and Upload in .gitlab-ci.yml. Clicking on that will give you console output, and you can watch this happening semi-live when it is building.

As you can see, the username and password are hidden.
No auto build !
Maybe you don't want the CI/CD pipeline to execute every time something changes and want to do it manually, the solution is to add following to your job .gitlab-ci.yml.
.
.
.
Build and Upload:
    stage: deploy
    rules:
        - when: manual
    tags:
        - rpi
.
.
.
Read more about rules here: GitLab Rules