Portainer/ UI
Why Portainer?
Although there are more the few UI managers for Kubernetes, Portainer is the easiest to setup on our Raspberry Pi 4 Kubernetes cluster. Core features are free and for our local use is more than enough. Although the one business feature I would like to have in free version is the ability to browse docker registry. If you have up to 5 node cluster, you can actually get Portainer business version for free, not sure if this is temporary action or not. I'm not sponsored by them (But guys, if you are reading this and want to sponsor me I will not say "no" to you). Look at the Portainer website for more info.
How to install Portainer
If you build the k3s Kubernetes cluster on your Raspberry Pi 4 with DietPi with me using this guide, you should have all prerequisites installed and ready.
Mostly it needs helm and storage class (in our case Longhorn) installed. It will eat 10 GB of space from storage.
Install using helm (as root from control node):
helm repo add portainer https://portainer.github.io/k8s/
helm repo update

helm install --create-namespace -n portainer portainer portainer/portainer
It should not take long and deploy single deployment with one container:
root@control01:~# kubectl get pods -n portainer
NAME                         READY   STATUS    RESTARTS   AGE
portainer-685c4f4bfc-p7znm   1/1     Running   0          2m27s

# See, it took 10 GB of space from storage.
root@control01:~# kubectl get pvc -n portainer
NAME        STATUS   VOLUME                                     CAPACITY   ACCESS MODES   STORAGECLASS   AGE
portainer   Bound    pvc-7f60d68b-911d-4119-a239-bb87bbf06599   10Gi       RWO            longhorn       3m23s
Next I have created service to expose our Portainer UI on its own IP address. Create folder called portainer and put the svc.yaml file there:
apiVersion: v1
kind: Service
metadata:
  name: portainer
  namespace: portainer
spec:
  selector:
    app.kubernetes.io/name: portainer
    app.kubernetes.io/instance: portainer
  type: LoadBalancer
  ports:
    - name: http
      protocol: TCP
      port: 9000
      targetPort: 9000
  loadBalancerIP: 192.168.0.20
Apply the service:
kubectl create -f svc.yamlThis will make the UI accessible on http://192.168.0.203:9000/.
Login to Portainer
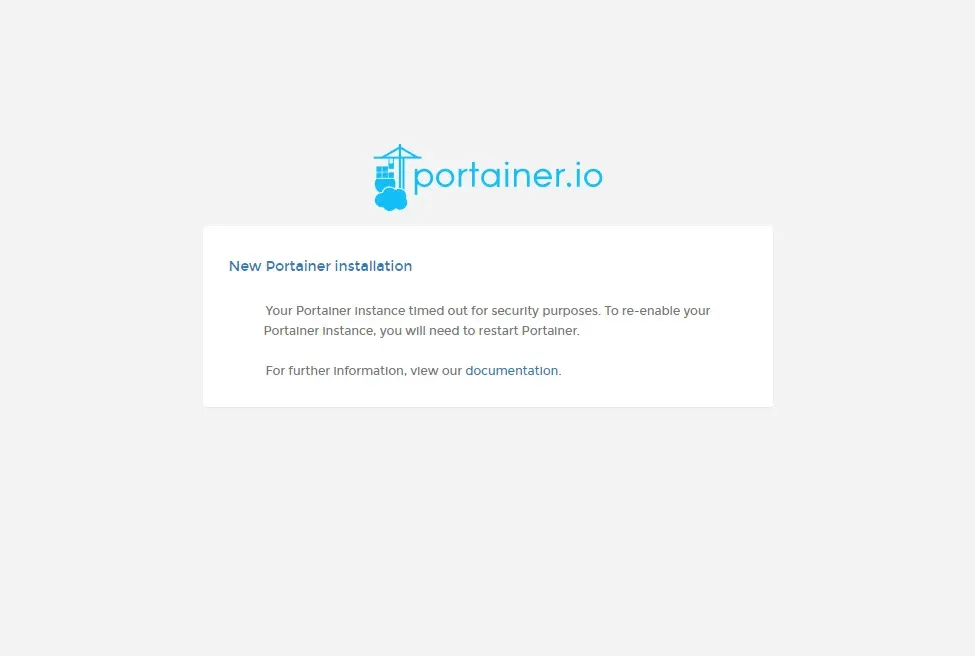
When you try to log in to the Portainer for the first time, and you took too much time, the UI will time out with this message: "Your Portainer Instance timed out for security purposes."
You need to restart the deployment. Restarting in Kubernetes is a bit tricky, here is a guide how to do it. We need to scale the container to 0, then scale it back to 1.
root@control01:~/portainer# kubectl get deployments -n portainer
NAME        READY   UP-TO-DATE   AVAILABLE   AGE
portainer   1/1     1            1           15m


root@control01:~/portainer# kubectl scale --replicas=0 deployment portainer -n portainer

root@control01:~/portainer# kubectl get deployments -n portainer
NAME        READY   UP-TO-DATE   AVAILABLE   AGE
portainer   0/0     0            0           15m

kubectl scale --replicas=1 deployment portainer -n portainer
After that try to log in again, you should get this screen:
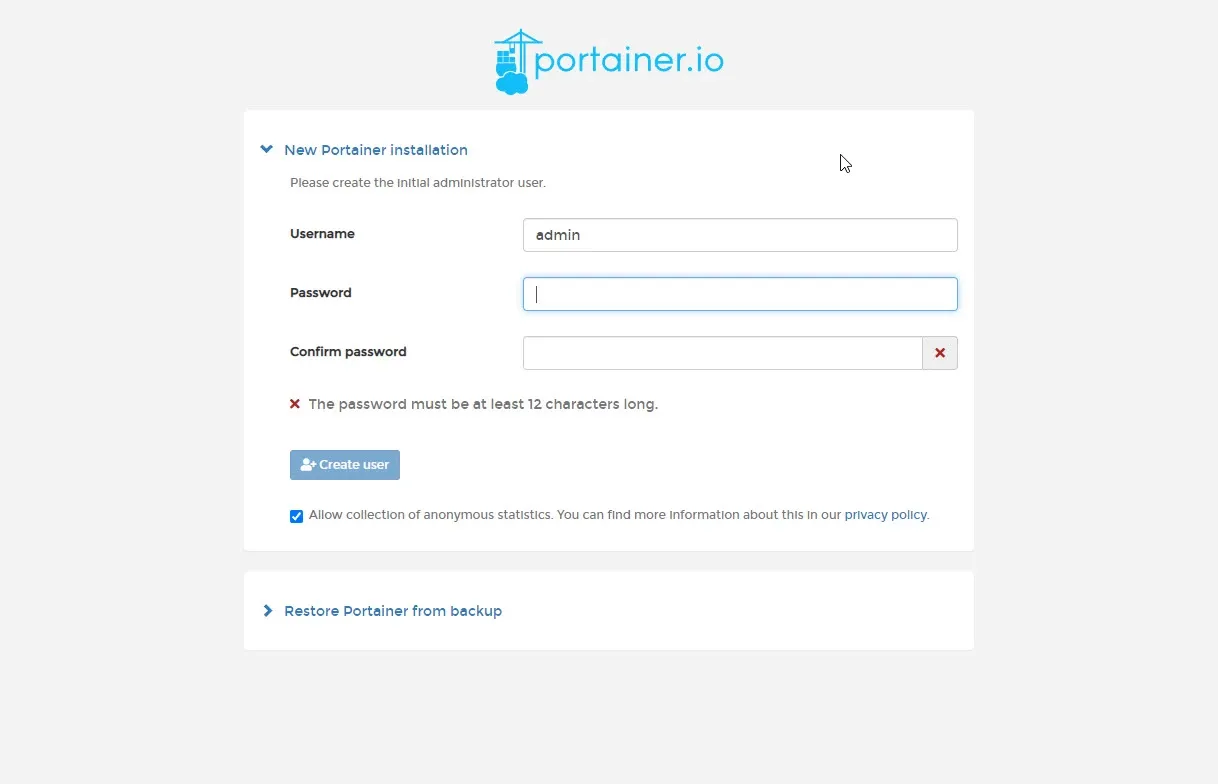
Create new user and set password.
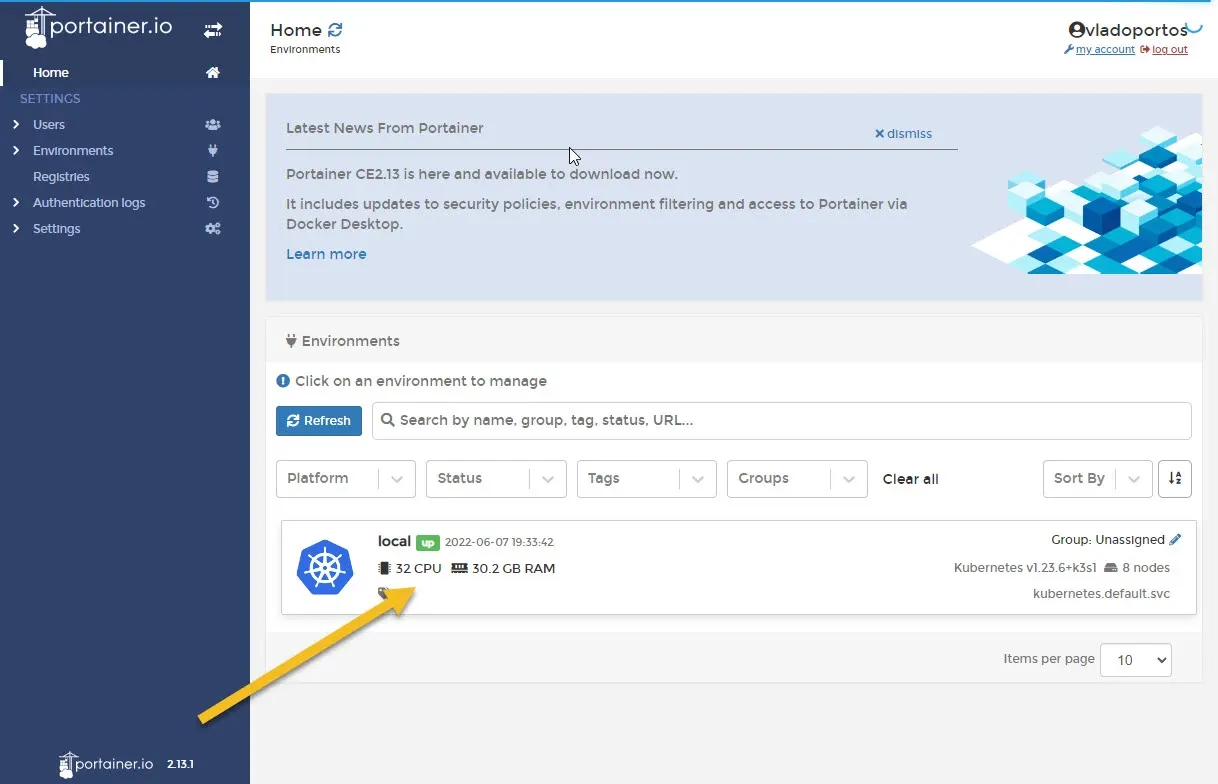
On the next screen, we will tell Portainer to use our Local environment. This will connect it to our k3s cluster.

You should see your k3s cluster in the list.
Portainer and local registry
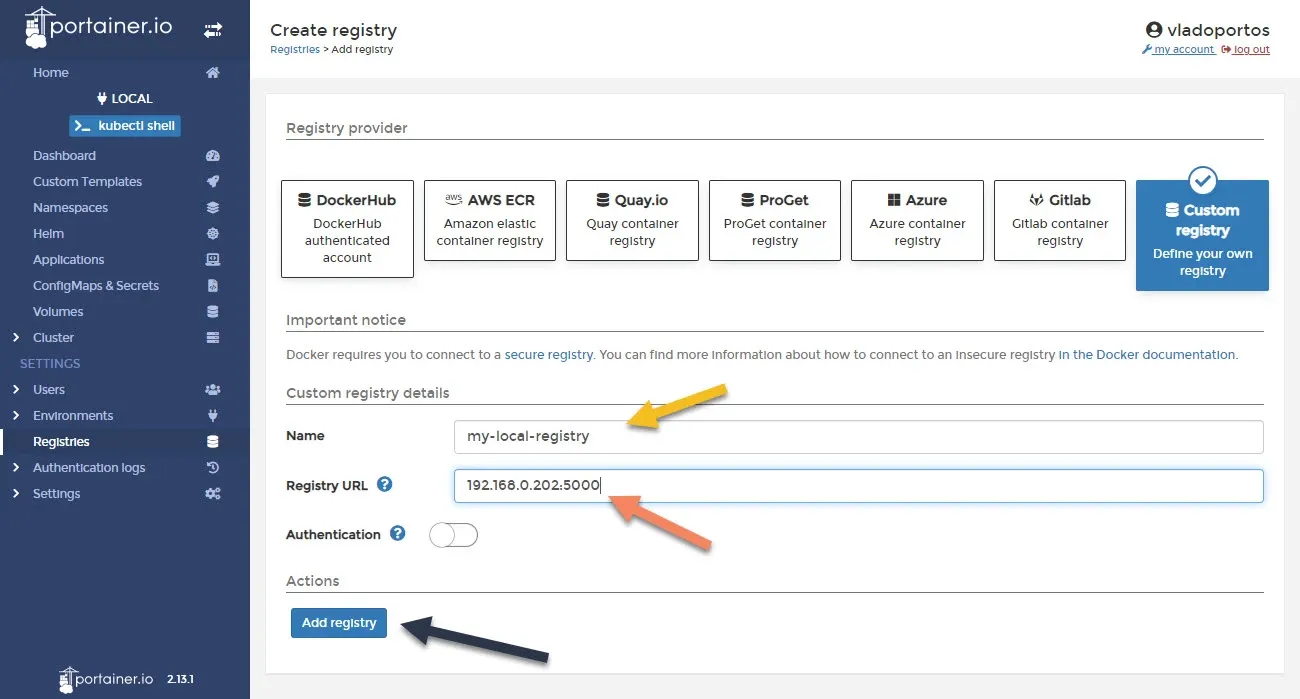
Next jump down on the menu and click on "Registries" tab and "Add registry".
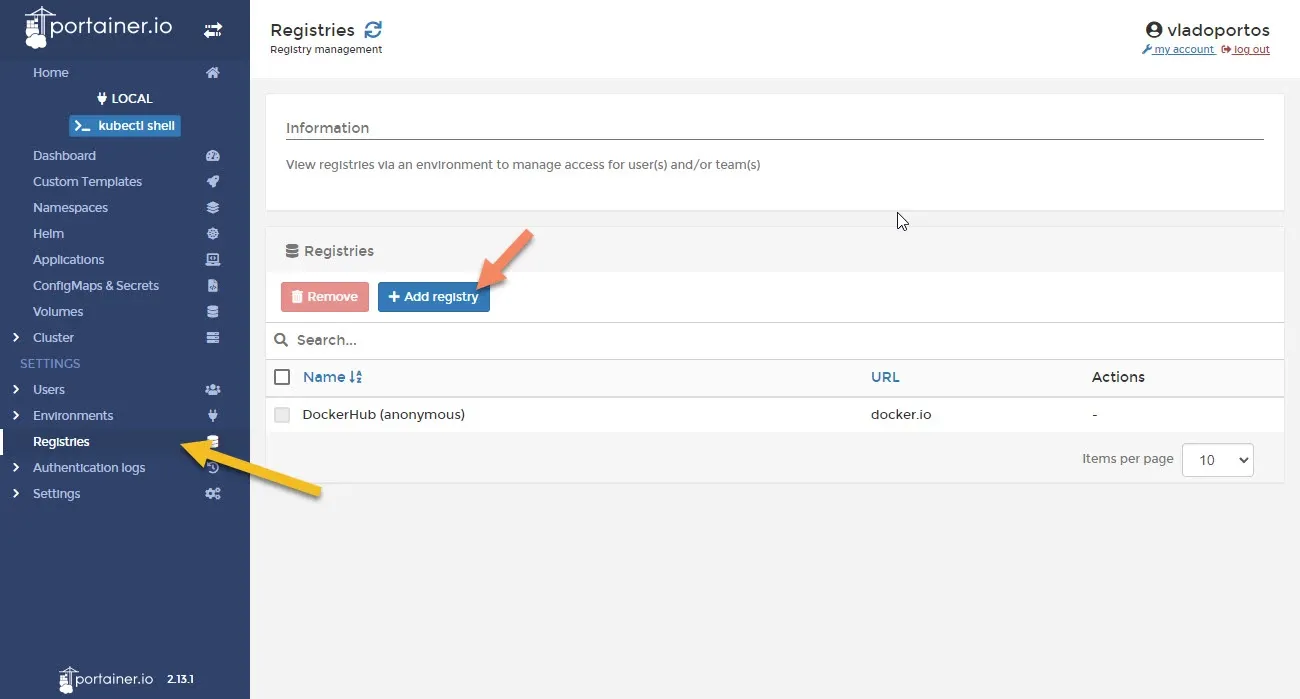
We will add our local docker registry to the list.
Done
That's it, you can now manage almost everything from this UI going further. Look at the Portainer documentation for more info. Portainer documentation.
Another solid part of our cluster is done, get some drinks and enjoy your k3s cluster.