Nodes
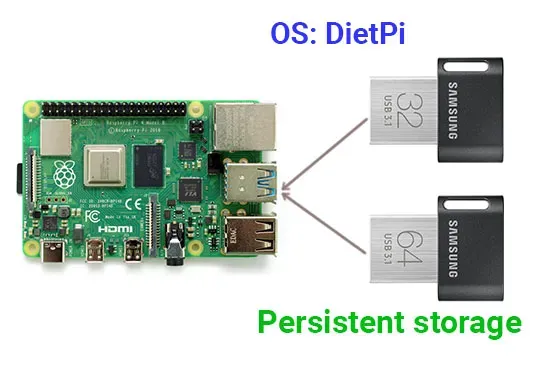
I have decided to use DietPi, since this one will boot from USB out of the box, it's 64bit and can be bootstrap from single file. Also come with hassle-free, build in, logging to ram option to save our USB/SD card.
Tools / Downloads
- Etcher (Super easy to “burn” the ISO to USB or SD card) – https://www.balena.io/etcher/ (You kind of do not need this since Raspberry Pi Imager can now flash the image too, but it can flash multiple USB drives at the same time.)
- DietPi– https://dietpi.com/ you need 64-bit version of DietPi.
- Raspberry Pi Imager – https://www.raspberrypi.org/downloads/ (To make Rpi4 boot from USB, it requires a firmware update)
- SSH client of your choice, usually putty. – https://www.putty.org/
Hardware to have
- Some kind of PC to set up the USB and SD card (windows ideally, but can be done with Linux or Mac just as well. We will focus on Windows).
- SD card reader
- USB keyboard / Micro HDMI cable / Monitor
- Rpi4 of course (just don’t go overboard with so many 😀)
- USB-C cable and way to power the Rpi4 or any other way to power it. See my chassis for details. Cluster chassis.
Update Raspberry Pi 4 firmware
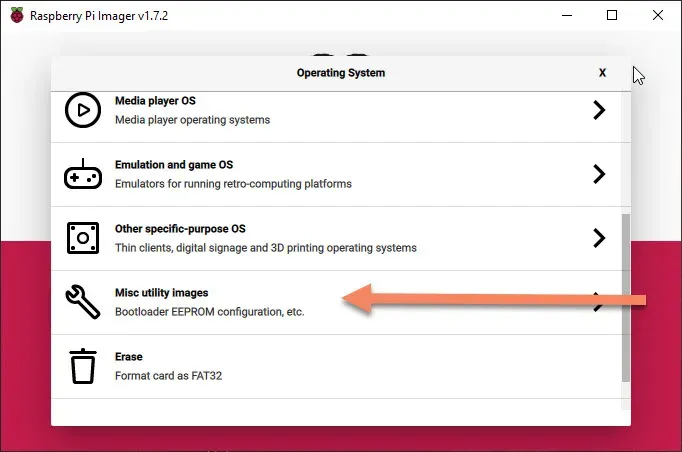
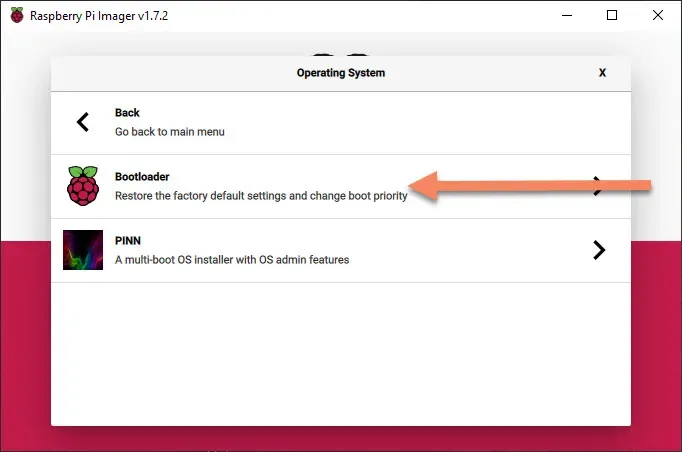
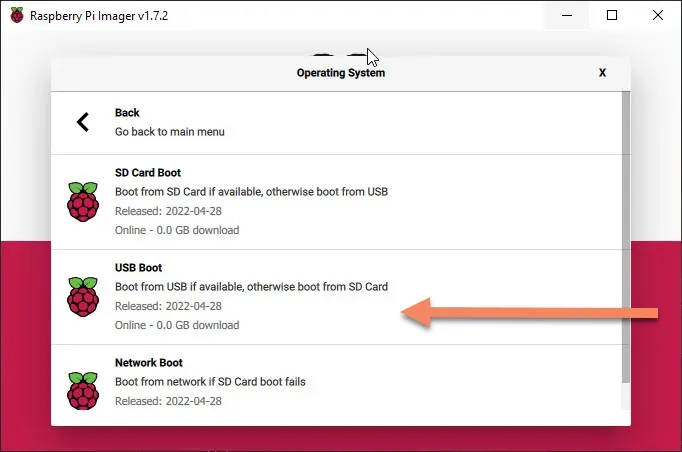
Most likely, you will have to update the firmware on Raspberry Pi 4 to enable USB boot. This firmware is out of beta and marked stable, so we should be ok. Sadly, there is an additional step you need to take: get the Raspberry Pi Imager and have it write Raspberry Pi 4 EEPROM boot recovery to the SD card. This is a tiny image and fast way to update firmware and enable boot from USB.

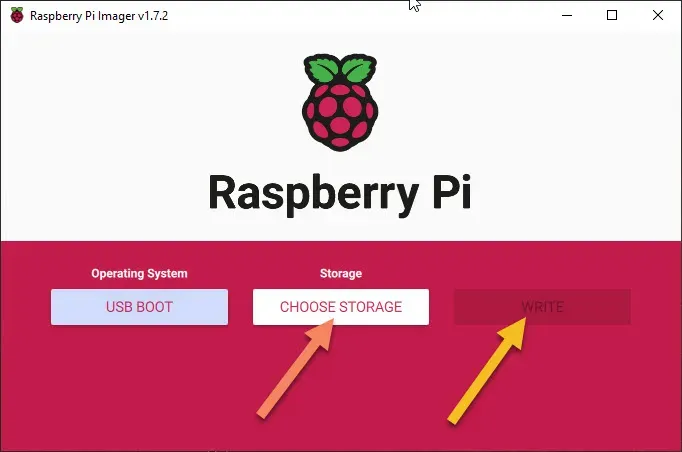
When done, put the SD card to Rpi4 and turn the power on. You don’t need to connect anything else. Just wait a minute or two until the green light next to power starts blinking periodically. That will mean it’s done. The new firmware should be flashed. We can use the same SD card to update every node.
Flash DietPi to USB
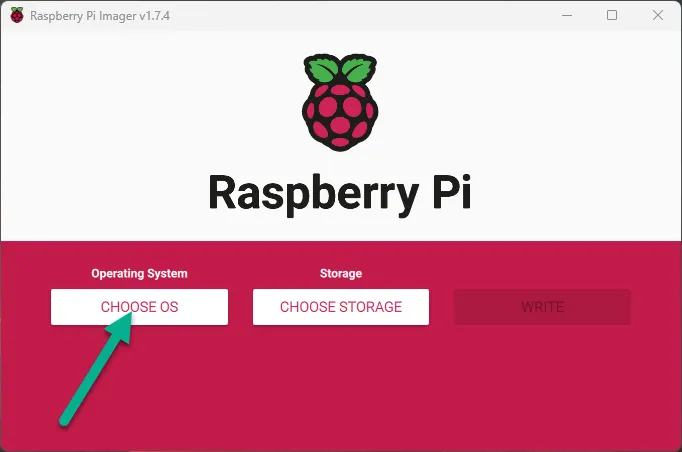
Depending on the number of Raspberry Pis, this will take some time, so just keep on it. There is no hurry, and between flashing you can prepare the DietPi USB. It goes without saying that you need to flash as many USB as you have nodes. In my case, it’s 8x 32 GB USB flash drives. For this task use etcher, or you can use Raspberry Pi Imager, which can also flash the image to USB.
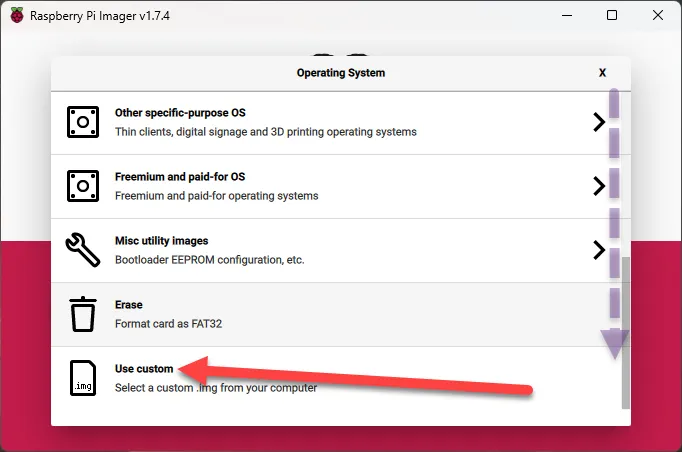
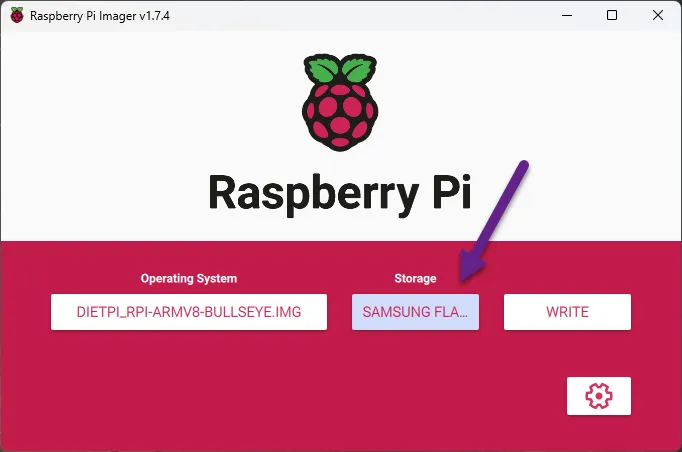
Flashing with Raspberry Pi Imager
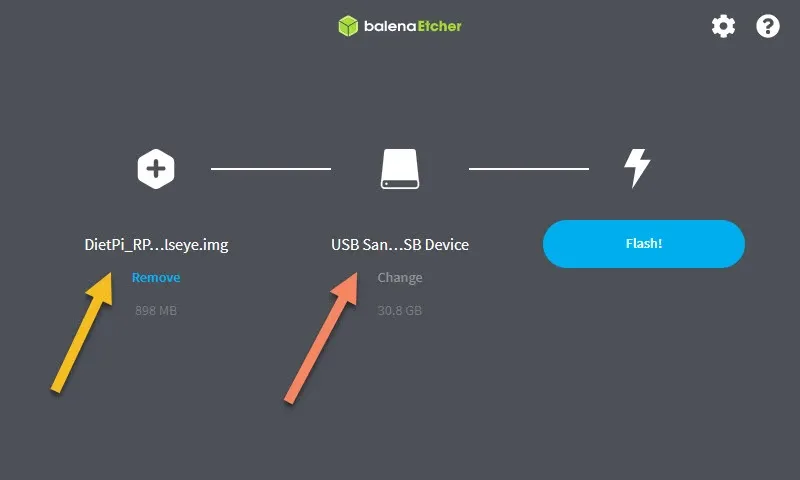
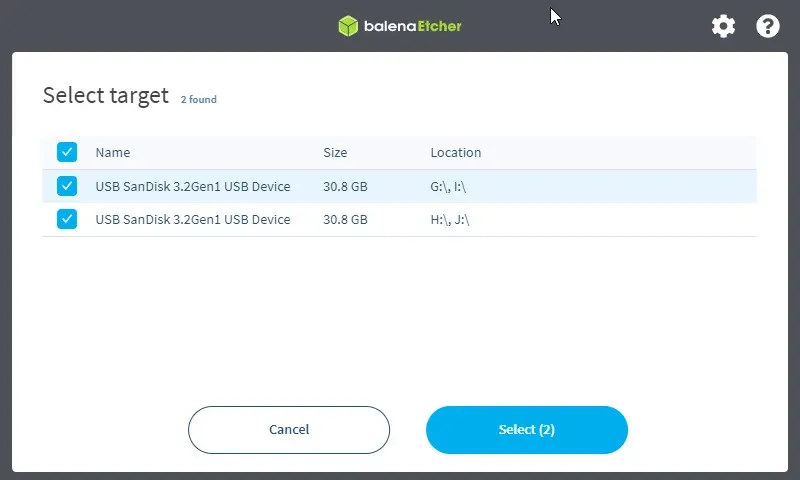
Flashing with Etcher
Headless Boot
There is a lot we can do with DietPi automatically at first boot without needing to even attach keyboard and monitor.
When you insert a USB disk with flashed DietPi from steps above, you will get one partition where you can see files in (on Windows).
dietpi.txt
Super easy way to bootstrap DietPi, is to use the file dietpi.txt.
Here is the content I used:
AUTO_SETUP_ACCEPT_LICENSE=1
AUTO_SETUP_LOCALE=C.UTF-8
AUTO_SETUP_KEYBOARD_LAYOUT=us
AUTO_SETUP_TIMEZONE=Europe/Bratislava
AUTO_SETUP_NET_ETHERNET_ENABLED=1
AUTO_SETUP_NET_WIFI_ENABLED=0
AUTO_SETUP_NET_ETH_FORCE_SPEED=0
AUTO_SETUP_NET_WIFI_COUNTRY_CODE=SK

AUTO_SETUP_NET_USESTATIC=1
AUTO_SETUP_NET_STATIC_IP=192.168.0.18
AUTO_SETUP_NET_STATIC_MASK=255.255.255.0
AUTO_SETUP_NET_STATIC_GATEWAY=192.168.0.1
AUTO_SETUP_NET_STATIC_DNS=1.1.1.1 8.8.8.8

AUTO_SETUP_DHCP_TO_STATIC=0

AUTO_SETUP_NET_HOSTNAME=cube08

AUTO_SETUP_BOOT_WAIT_FOR_NETWORK=1
AUTO_SETUP_SWAPFILE_SIZE=1
AUTO_SETUP_SWAPFILE_LOCATION=/var/swap
AUTO_SETUP_HEADLESS=1
AUTO_UNMASK_LOGIND=0
AUTO_SETUP_CUSTOM_SCRIPT_EXEC=0
AUTO_SETUP_BACKUP_RESTORE=0
AUTO_SETUP_SSH_SERVER_INDEX=-2
AUTO_SETUP_LOGGING_INDEX=-1
AUTO_SETUP_RAMLOG_MAXSIZE=200

AUTO_SETUP_WEB_SERVER_INDEX=0
AUTO_SETUP_DESKTOP_INDEX=0
AUTO_SETUP_BROWSER_INDEX=0
AUTO_SETUP_AUTOSTART_TARGET_INDEX=7
AUTO_SETUP_AUTOSTART_LOGIN_USER=root
AUTO_SETUP_GLOBAL_PASSWORD=dietpi
AUTO_SETUP_AUTOMATED=1
SURVEY_OPTED_IN=0

#OpenSSH Client
AUTO_SETUP_INSTALL_SOFTWARE_ID=0
#Samba Client
AUTO_SETUP_INSTALL_SOFTWARE_ID=1
#vim
AUTO_SETUP_INSTALL_SOFTWARE_ID=20
#RPi.GPIO
AUTO_SETUP_INSTALL_SOFTWARE_ID=69
#OpenSSH Server
AUTO_SETUP_INSTALL_SOFTWARE_ID=105
#Python 3 pip
AUTO_SETUP_INSTALL_SOFTWARE_ID=130

CONFIG_CPU_GOVERNOR=schedutil
CONFIG_CPU_ONDEMAND_SAMPLE_RATE=25000
CONFIG_CPU_ONDEMAND_SAMPLE_DOWNFACTOR=40
CONFIG_CPU_USAGE_THROTTLE_UP=50

CONFIG_CPU_MAX_FREQ=Disabled
CONFIG_CPU_MIN_FREQ=Disabled

CONFIG_CPU_DISABLE_TURBO=0

CONFIG_PROXY_ADDRESS=MyProxyServer.com
CONFIG_PROXY_PORT=8080
CONFIG_PROXY_USERNAME=
CONFIG_PROXY_PASSWORD=

CONFIG_G_CHECK_URL_TIMEOUT=10
CONFIG_G_CHECK_URL_ATTEMPTS=5
CONFIG_CHECK_CONNECTION_IP=8.8.8.8
CONFIG_CHECK_DNS_DOMAIN=google.com

CONFIG_CHECK_DIETPI_UPDATES=1
CONFIG_CHECK_APT_UPDATES=1
CONFIG_NTP_MODE=2
CONFIG_SERIAL_CONSOLE_ENABLE=0
CONFIG_SOUNDCARD=none
CONFIG_LCDPANEL=none
CONFIG_ENABLE_IPV6=0

CONFIG_APT_RASPBIAN_MIRROR=http://raspbian.raspberrypi.org/raspbian/
CONFIG_APT_DEBIAN_MIRROR=https://deb.debian.org/debian/
CONFIG_NTP_MIRROR=debian.pool.ntp.org

#----------------------------------------------------------------------------------
##### DietPi-Software settings #####
#----------------------------------------------------------------------------------
SOFTWARE_DISABLE_SSH_PASSWORD_LOGINS=0

#----------------------------------------------------------------------------------
##### Dev settings #####
#----------------------------------------------------------------------------------
DEV_GITBRANCH=master
DEV_GITOWNER=MichaIng

#----------------------------------------------------------------------------------
##### Settings, automatically added by dietpi-update #####
#----------------------------------------------------------------------------------
The parts you should look at:
- AUTO_SETUP_TIMEZONE=Europe/Bratislava - Timezone, change to your preference. Full list of timezones can be found here.
- AUTO_SETUP_NET_STATIC_IP=192.168.0.18 - Static IP, change to your preference. Change for each node.
- AUTO_SETUP_NET_STATIC_MASK=255.255.255.0 - Static IP mask
- AUTO_SETUP_NET_STATIC_GATEWAY=192.168.0.1 - Static IP gateway
- AUTO_SETUP_NET_STATIC_DNS=1.1.1.1 8.8.8.8 - Static IP DNS
- AUTO_SETUP_NET_HOSTNAME=cube08 - Hostname, change to your preference. Change for each node. K3s requires a unique hostname for each node.
- AUTO_SETUP_GLOBAL_PASSWORD=dietpi - Password, change to your preference. I kept it the same for each node. This is root password and also password for user dietpi.
The explanation of the settings can be found here
All in all this will assign IP address, hostname, timezone, keyboard layout, etc. to your Raspberry Pi. It will install SSH server, vim, RPi.GPIO, OpenSSH client, OpenSSH server, Python 3 pip, Samba client, and more. It will also install the latest stable version of DietPi. That's a lot of work done for us.
cmdline.txt
Edit this line.
root=PARTUUID=92b3e04f-02 rootfstype=ext4 rootwait fsck.repair=yes net.ifnames=0 logo.nologo console=serial0,115200 console=tty1group_enable=cpuset cgroup_enable=memory cgroup_memory=1 to the end.It should look something like this:
root=PARTUUID=92b3e04f-02 rootfstype=ext4 rootwait fsck.repair=yes net.ifnames=0 logo.nologo console=serial0,115200 console=tty1 group_enable=cpuset cgroup_enable=memory cgroup_memory=1
We have added some parameters like:
- group_enable=cpuset
- cgroup_enable=memory
- cgroup_memory=1
These are required for Docker to work properly and adding them now will save us a reboot later.
Boot up
Plug the USB disk into the Raspberry Pi 4 and plug in the power. Now wait few minutes, watch on the router for a new IP to appear 🙂. Give it enough time, it is doing a lot of things. If you can attach your monitor and keyboard, you can see the progress of the installation.
Hopefully, you were able to ssh to the new IP and log in with username: root / password: dietpi.
You might get warning that installation is still in progress. This is normal, disconnect and try again in a few minutes.

We are going to do some manual tasks on each node. And later we use Ansible a little to help us execute commands on all nodes at once (and yes, you can make one Ansible playbook that would do 99% of deployment, but that’s for another tutorial 🙂).
Cluster box
I went a bit overboard with Cluster Box... Even more in version 3.0 now in 2022.
My main inspiration was HP Blade servers or blade serves in general. I really wanted to solve the power issue with Raspberry Pi 4, where USB hub power was often not enough and cables were everywhere. Made my own Raspberry Pi 4 blade chassis, with enough power, and cooling. It's pretty portable as well and just look cool 🙂